Chapter 1: Why WooCommerce
If you’re reading this guide, you’re likely in one of two situations.
Situation one – you’re still on the fence about migrating from Shopify to WooCommerce and you’re doing a little bit of homework to decide whether or not to make the switch.
Situation two – you’ve already decided to make the switch and you’re trying to figure out the best way to move forward.
If you’re in group two and you’re ready to rock and roll, you can skip on ahead to chapter two as the rest of this chapter will talk about why you may want to make the switch.
Why Choose WooCommerce Over Shopify
Depending on your needs, there are a few reasons why WooCommerce is a better fit for your business over Shopify:
Infinite possibilities for flexibility and customization
WooCommerce is open-source, which means you can customize every single aspect of the platform. You can modify code, create your own custom plugins, and design unique themes.
In contrast, Shopify is closed-sourced – they own the source code and are the gatekeepers for any customizations outside the scope of what they provide.
Now, because WooCommerce is open source, there are endless possibilities for customizations at your fingertips because developers can (and do) create plugins to solve a variety of problems.
As of this writing, there are 818 extensions in the WooCommerce Extension Store to help you customize your shop. From payments (more on those in a minute), to shipping, analytics, customer feedback, marketing, and more.
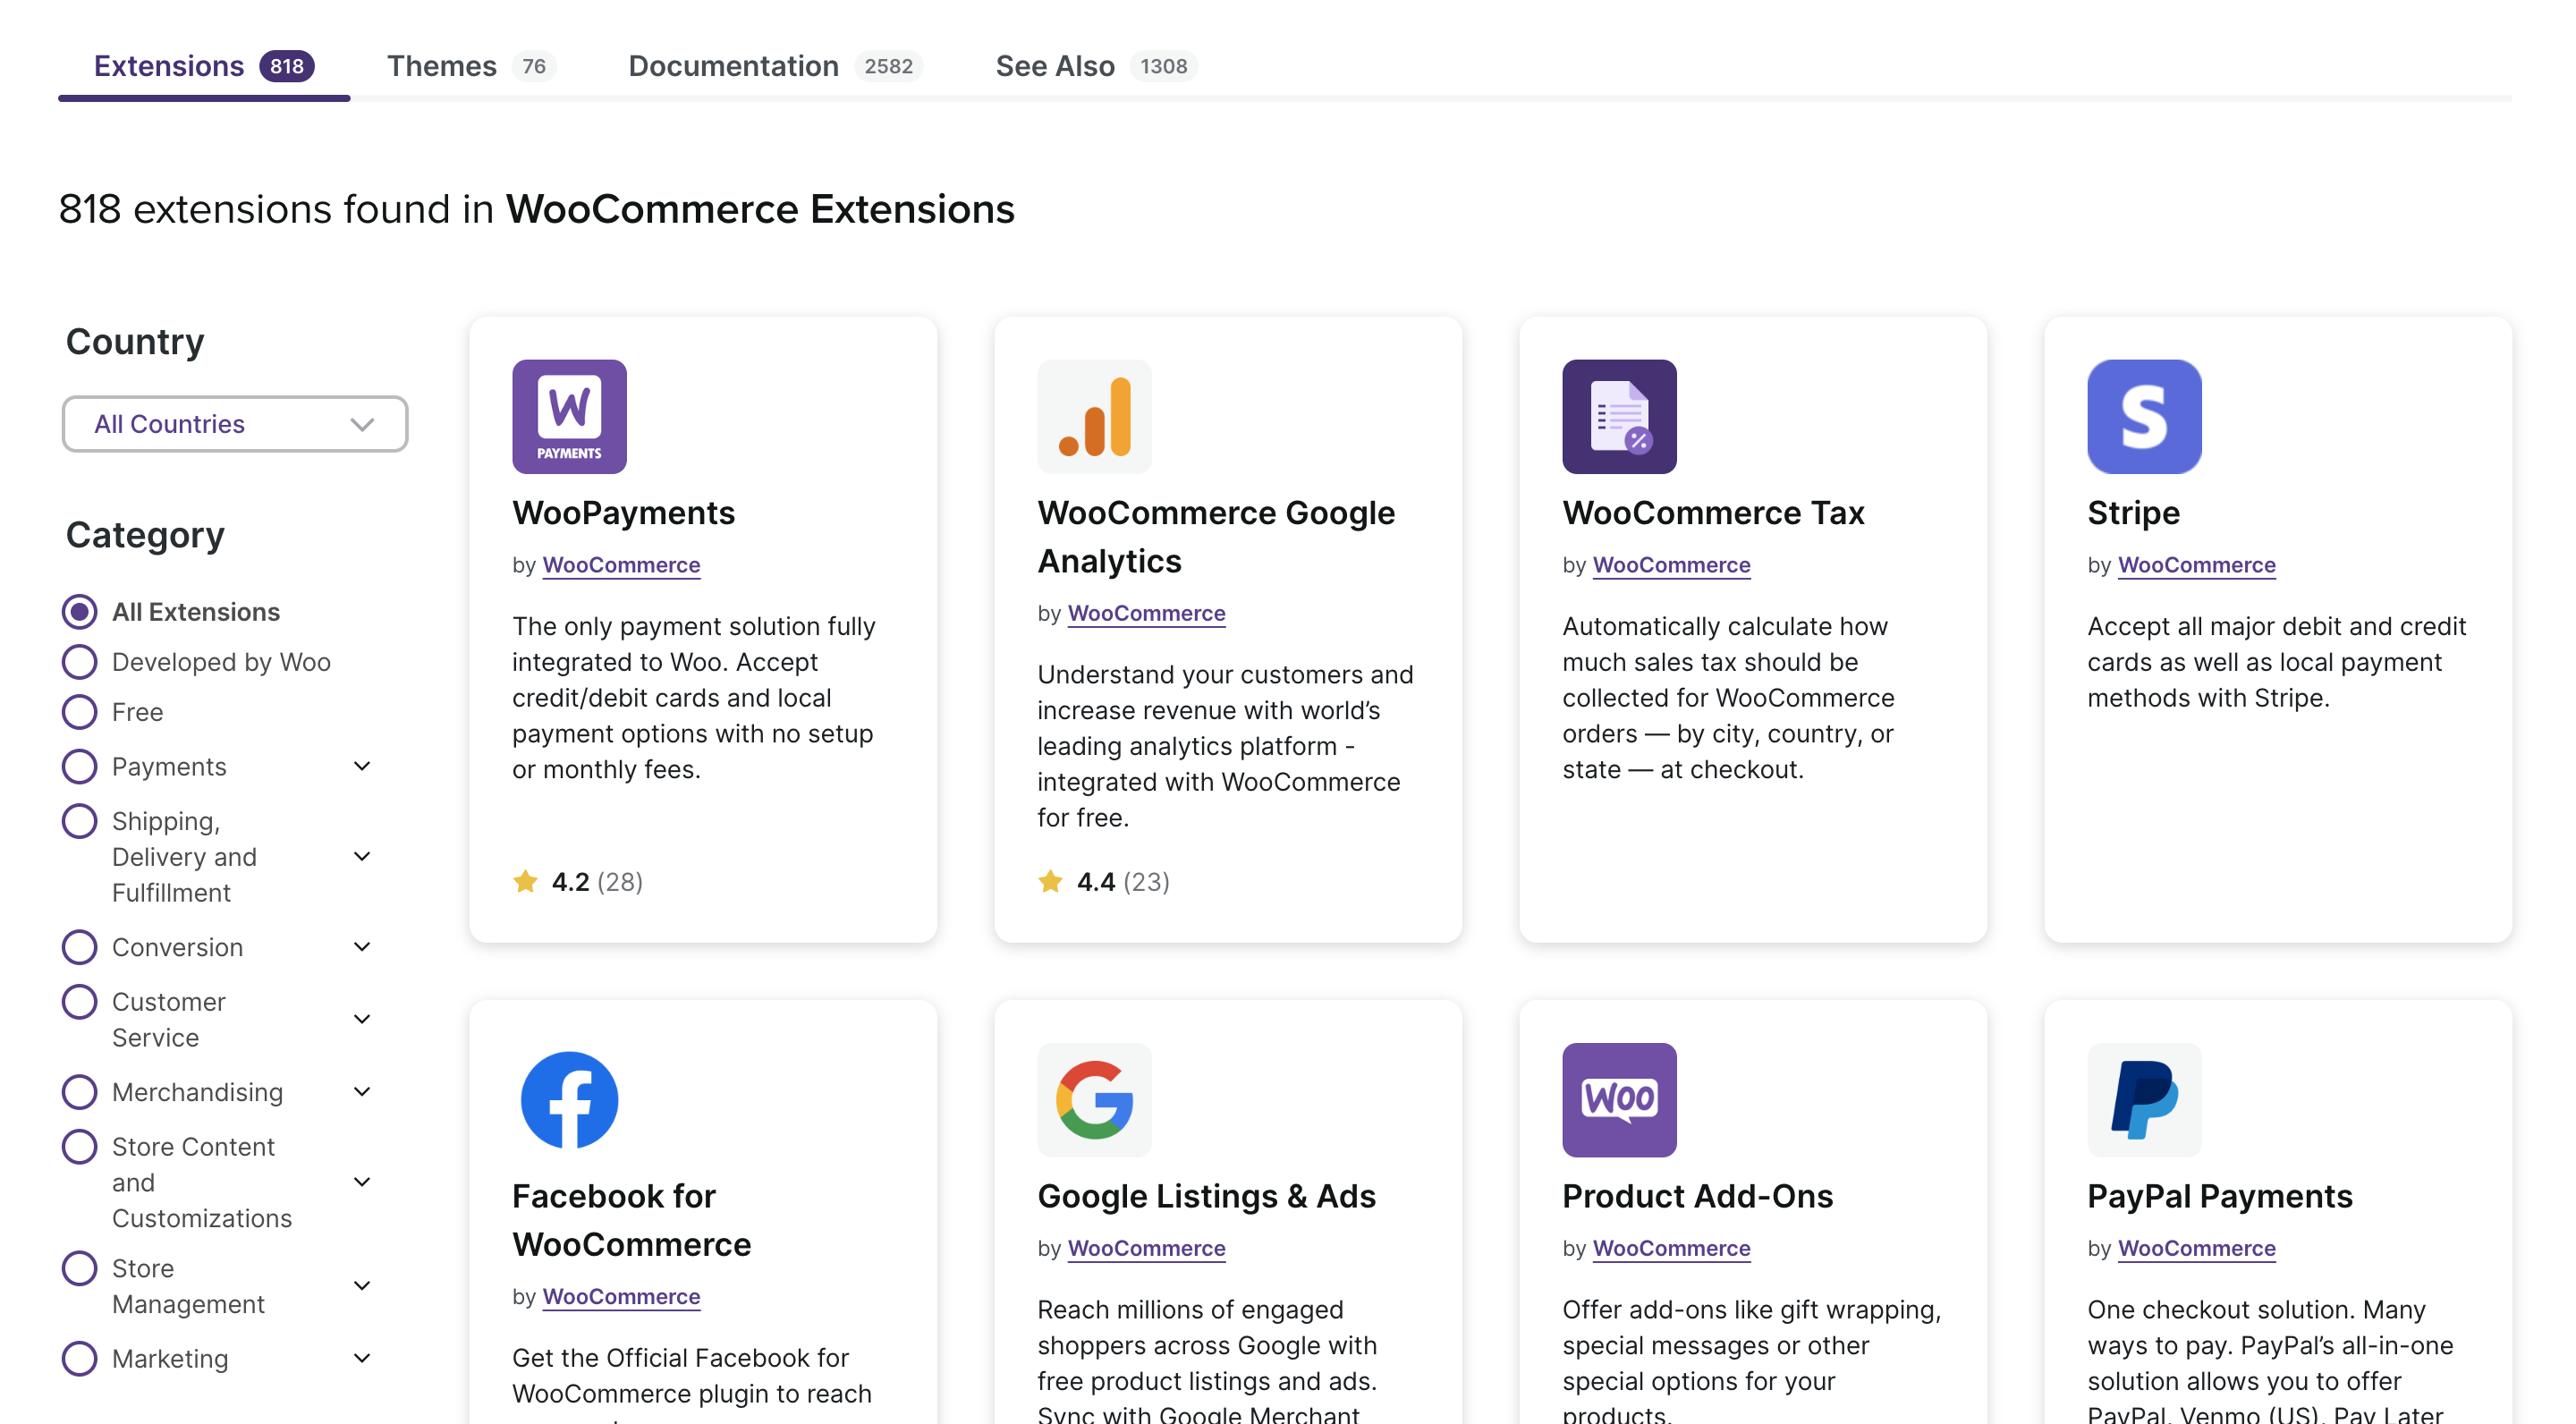
Not to mention the 58,000+ free and paid WordPress plugins you’d have access to in your WooCommerce store (since WooCommerce is built on top of WordPress).
So if you’re running into roadblocks with Shopify when it comes to customizing your store to match your vision, switching to WooCommerce will help get you unblocked.
Inventory Management
If you’re a shop that sells products with numerous product variations, you’ll most likely want to give the nod to WooCommerce which doesn’t provide you with a hard cap on the number of product variations you can use.
On the other hand, Shopify has a hard cap of 100 variants and three total options per product.
One hundred may seem like a lot of variants, but in reality it’s not that difficult to hit that limit.
Imagine you’re selling t-shirts. You could be over the 100 variant limit on Shopify by having 6 sizes (XS, S, M, L, XL, XXL), 10 different colors, and 2 types of materials used (6 x 10 x 2 = 120).
Now, there are certainly ways around this in Shopify, including how you organize your catalog and using plugins to increase your variant limit. But if you’re looking for a solution that can handle numerous variants out of the box, WooCommerce is the move.
Cost Effectiveness
Since WooCommerce is open-source, the platform itself is 100% free to use. So if you’re looking to set up a store on the cheap, all you’d need to pay for is web hosting and a domain name and you’re good to go.
Now, the low cost to get started isn’t the only reason WooCommerce is more cost-effective than Shopify. If you have an existing store on Shopify, chances are you can save money in a variety of places.
For starters, WooCommerce doesn’t charge a transaction fee for using third-party payment providers (more on this below). So if you are using a popular payment provider like Authorize.net, Braintree, or Paypal, you can expect instant savings when you migrate over.
With WooCommerce, you have the freedom to choose whatever hosting provider you want, which means you could save money by switching to a more budget friendly provider.
Being open-source and free, WooCommerce doesn’t have an ongoing subscription fee. So if you’re looking to save money by making the switch, you can bank on slashing the subscription fee from your budget.
And finally, since WooCommerce doesn’t gate any features behind higher tiered plans (since they don’t have them) AND has a huge library of plugins, chances are you’ll be able to replace all the features and functionality of Shopify without incurring the cost.
Now, to be fair, if you aren’t tech savvy you may need to spend more upfront on development to get the store you want. But in the long run you can expect WooCommerce to be more cost-effective.
Full control over payment gateways
Both Shopify and WooCommerce offer integrations with major payment solutions, but WooCommerce gives you the ability to connect to a variety of payment gateways.
As of this writing there are 48 processors and gateways in the WooCommerce extension store.
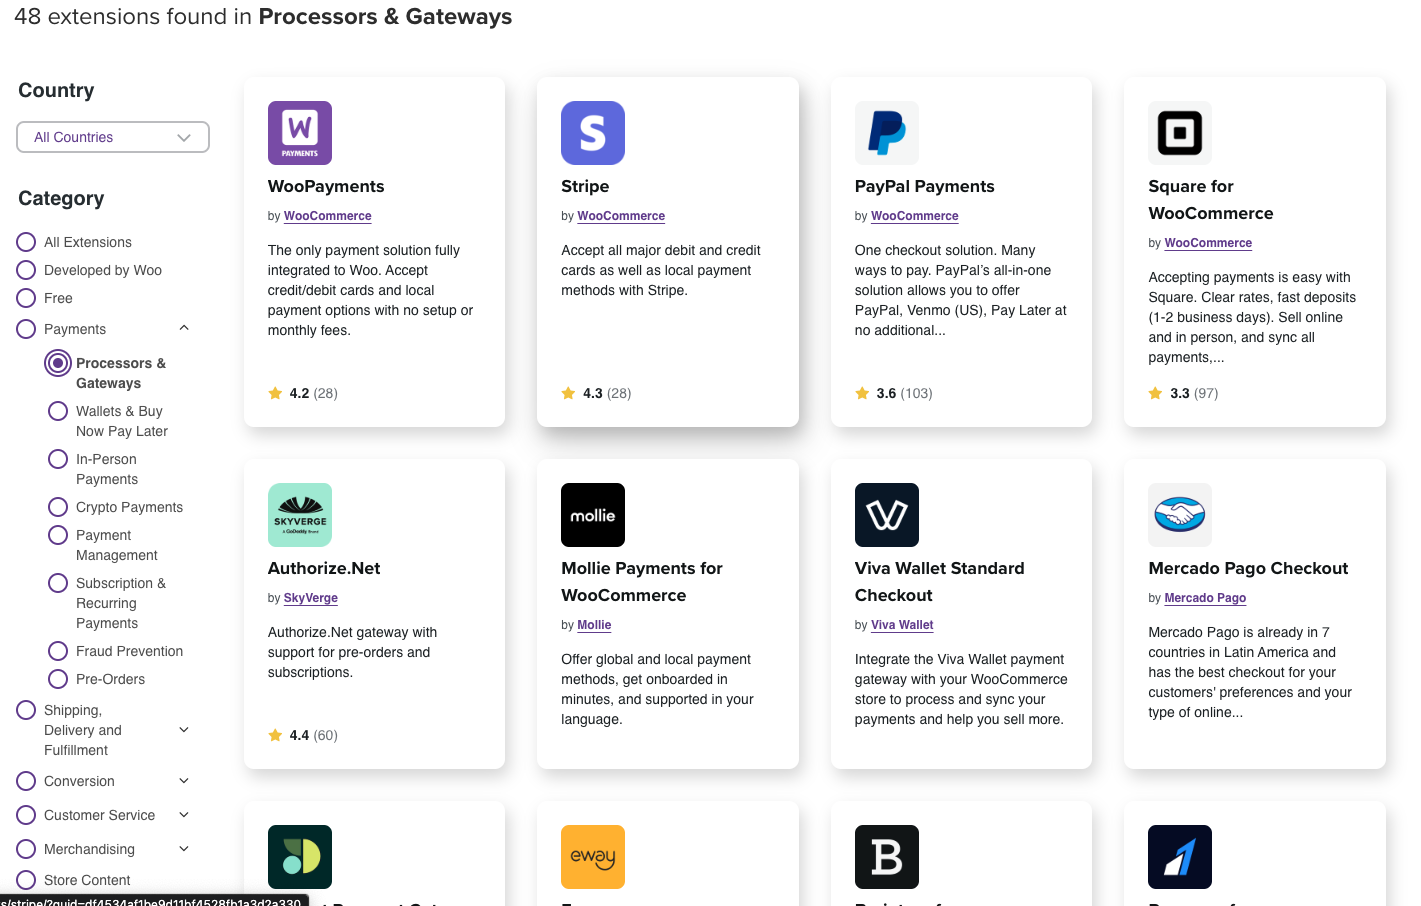
Having access to more than just the major payment players is especially important – and may be necessary – if you’re selling internationally or run a store deemed “high-risk” by Shopify (i.e. you sell CBD, health & beauty, nutraceuticals, etc).
Even if you’re not selling internationally or are not considered a high-risk business, it’s best practice to always have a backup payment gateway or two ready in case your main payment gateway goes down. Otherwise you’re putting yourself at risk of missing out on sales.
Now, Shopify does let you connect to third party payment gateways. The kicker though is that Shopify charges an additional transaction fee for all-third party gateways.
Imagine this scenario: you run a Shopify store and your primary payment gateway gets hit with a series of potential fraudulent charges and goes down. You’re a savvy business owner though, so you have a third party gateway ready to go.
But you forgot Shopify charges up to 2% per transaction for using a third party gateway. So while your primary gateway is down you could be paying upwards of 5% in transaction fees!

Ouch. No bueno.
Last thing on payment gateways. If getting your money instantly is important for cash flow management in your business, you can take advantage of WooCommerce Payments which offers instant deposits vs. a two-day minimum on Shopify.
WooCommerce Payments is WooCommerce’s payment solution that simplifies the entire process for you – managing your payments, disputes, deposits and recurring revenue all in one place.
Complete ownership & control
One of the biggest drawbacks of Shopify is that your control is limited to what Shopify lets you control.
And while Shopify continues to add features and functionality that give you back control, there are certain items that still lag behind (and may never catch up).
Here are a few examples:
Hosting. As mentioned above, with WooCommerce you choose your own hosting provider. This means you can select a host based on your particular needs, budget, and preferences, including managing your own hosting.
Data ownership and access. Shopify stores your data on their servers, and direct access to the underlying database is restricted.
With WooCommerce, you own and control all of your data, with the ability to access the database directly if you need to run complex queries or make bulk changes.
Checkout process customization. Please do not underestimate the importance of the ability to customize your checkout process. Once someone starts the checkout flow, small changes in UX/UI can have a big impact on your overall conversion rate.
With WooCommerce you can customize the entire checkout process – flow, fields, design. Everything. With Shopify you are very limited in the customizations you can make out of the box. And if you want more customization options, you are required to upgrade to Shopify Plus which starts at $2,000/month.

SEO capabilities
Both WooCommerce and Shopify have the capabilities to optimize for core SEO principles like quality content, backlinks, site speed, and user experience. However, if you’re looking to squeeze every last drop out of your store’s SEO WooCommerce is the way to go.
Here are a few examples:
Access to .htaccess. WordPress gives you access to the .htaccess file, allowing you to make advanced redirects, modify HTTP headers, and implement more complex SEO tactics that might be necessary for some situations.
Full control over site structure. WooCommerce users can customize their website’s structure more deeply, including custom post types, taxonomies, and more. This is useful for creating a website hierarchy that’s optimal for SEO.
Custom XML sitemaps. While both platforms allow for XML sitemaps, WordPress plugins offer a higher level of customization and control as to what you can include or exclude.
Custom URL structures. WordPress (and by extension, WooCommerce) allows for detailed control over URL structures, including custom slugs, permalink settings, and more. While Shopify does a decent amount of URL customization, it does force you into a folder setup that can have a negative impact on your SEO if you’re not careful.
Scalability & performance
This topic (like most topics in this guide) deserves a post of its own. But like most of the differences between WooCommerce and Shopify, scalability and performance boils down to the open-source vs. closed-source approaches.
WooCommerce is self-hosted, so you have complete control over your server environment. This means as your site grows you can optimize server resources, move to a dedicated server, or scale up with managed WordPress hosting providers like Cloudways, WPEngine, and SiteGround.
Legal & compliance
Finally, for legal and compliance reasons you may want to migrate your store from Shopify to WooCommerce. Here are some potential reasons to consider:
Data sovereignty and GDPR. Certain countries or regions that have laws regarding where personal data can be stored. If you sell into those countries, WooCommerce gives you the ability to select hosting providers in specific jurisdictions, ensuring data sovereignty. This can be critical for GDPR compliance and other similar data protection regulations.
Data access and ownership. With a self-hosted solution like WooCommerce, your business has complete ownership and direct access to all the data. This may be important for compliance with regulations that require businesses to produce specific records or data on demand.
Custom privacy and security protocols. While Shopify has its own security measures, WooCommerce allows for more tailored security protocols. A business with unique security requirements (due to industry-specific regulations, for example) might find WooCommerce more accommodating.
Payment compliance. Different countries and regions might have specific requirements about how payments are processed. WooCommerce’s flexibility allows for integrating a vast array of payment gateways or creating custom solutions to ensure compliance with local payment regulations.
Custom terms of service and policies. While both platforms allow for custom terms of service and other policies, WooCommerce provides more freedom to integrate these elements seamlessly into the customer journey, which might be important for specific regulatory environments.
Industry-specific regulations. Some industries, like healthcare, have strict regulations about data handling, storage, and transmission. WooCommerce’s flexibility can cater to these niche requirements more easily than a one-size-fits-all solution.
Integration with other systems. For compliance or legal reasons, businesses might need to integrate their e-commerce platform with other systems (e.g., CRM, ERP, or proprietary systems). The open nature of WooCommerce can make such integrations more feasible or more in-depth.
Auditing and reporting. Depending on the jurisdiction or industry, there might be specific requirements for how business transactions are audited and reported. WooCommerce can be customized to generate specific types of reports or logs to meet these requirements.
Limitations on selling certain products. Shopify, being a hosted solution, might have restrictions on selling certain types of products or services, either due to their own policies or due to broader platform considerations. With WooCommerce, a business has more freedom to decide what they sell, as long as it complies with local laws.
Avoiding third-party restrictions. Shopify, like all platform providers, has its terms of service. If there’s a concern that the business model or product might conflict with those terms, a self-hosted solution removes that layer of potential restriction.
Please note! While WooCommerce offers flexibility, with great flexibility comes great responsibility. Always consult with legal professionals when considering platform changes for legal or compliance reasons.
—
If, coming into Chapter 1, you were on the fence about whether or not to make the switch from Shopify to WooCommerce, hopefully you’ve been swayed to make the move to WooCommerce (assuming it makes the most sense for your business).
And now that you’re ready to make the move, let’s get you prepped for migration.
Chapter 2: Prepare To Migrate
Now that you’re convinced migrating from Shopify to WooCommerce is the right move for your business (or you already knew and skipped ahead to this chapter), you’re probably raring to go!
But, before you get to the nitty gritty of moving data, you’ll want to do some prep work to ensure a smooth process.
Backup Your Shopify Store
Step zero in any project that requires making major changes to your online store (or any website for that matter) is to create a backup.
The easiest way to do this is to export your product data from Shopify in CSV format. The downside of this approach is that you won’t be backing up the rest of your store’s details and design (which isn’t functionality Shopify offers out of the box).
To backup your entire store you’ll want to use an app such as Rewind Backups or Talon Backups, which can be found in Shopify’s App Store.
While, theoretically, you shouldn’t lose any data from your existing store during the migration process, it’s always a good idea to back any site’s data in case issues arise.
Choose Hosting
While WordPress and WooCommerce are free, you’ll need to get a paid hosting plan to store your site on. There are many hosting providers out there with a great deal of hosting options so before you make a decision, here are some things to consider.
How many websites and pages are you going to run from your server? Hosting basically provides you with storage space on an online server that connects to your existing domain (website name) and displays your site to anyone accessing that domain. If you’re going to be running a larger operation which will have a lot of content or multiple sites, hosting specifications should be adjusted accordingly.
What level of security does the host provide and how much liability do they assume? From automated backups to brute-force attacks and anything in between, you can find WordPress plugins to help you with security, but having your host already take care of such issues saves you a lot of time and displays traits of a quality service.
How good is customer support? There’s a good chance that you’ll eventually need to check in with your host’s support to identify solutions for a number of small to large issues that can pop up over time. Having a good idea about what kind of support they offer and how easy it is to access it is another important time-saving factor and can even become a money-saving feature.
What is the host’s server uptime average? These days, uptime is rarely an issue anymore thanks to redundancy setups that good hosting services ensure, but it’s good to check in with a possible host option to see what their server uptime has been historically. At least for the last few months.
Is the service a good match for your site traffic, can it handle influxes? Once again, depending on how big your business is, it may come to require a lot of resources to host the online store and you need to make sure that the host’s technical infrastructure can match your needs. More often than not, this shouldn’t be an issue with already established hosting brands.
Pricing for hosting services can range anywhere from $3.99 per month, up to a few thousand dollars depending on your businesses needs like how much data you’ll have on your store, how much traffic you’ll get and what kind of flexibility you’re looking for at peak times. Smaller businesses can very well go for cheaper options and scale up as their traffic grows. In many cases you’ll also be able to get a trial period to decide if the service works for you.
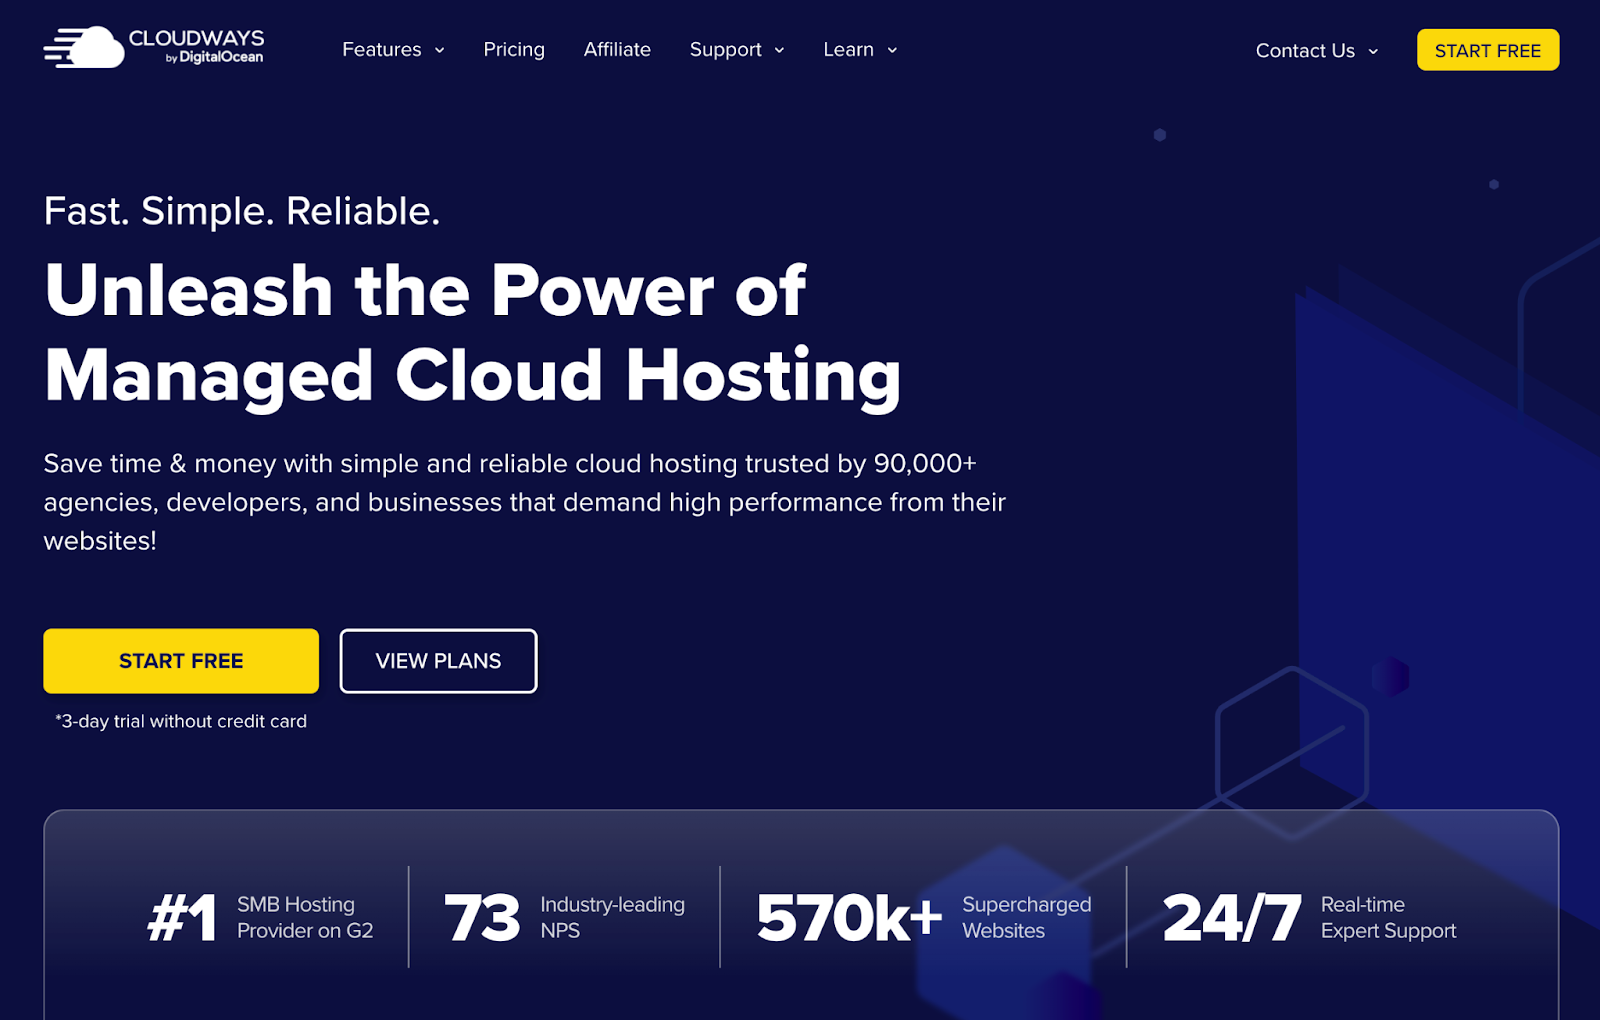
One great example for hosting is Cloudways. A hosting provider with a great reputation that checks off pretty much all the boxes that we mentioned above. If you’re also looking for other options recommended by WooCommerce to compare, there are Bluehost, SiteGround and Pressable for beginners or Kinsta, WP Engine, DreamHost and many others for general purpose.
Many hosting services will also include special packages that are WordPress or even WooCommerce centric and have their resources managed in such a way that they provide a better experience for these types of websites.
If you’re not terribly excited to learn about what specifics are most suited for your store or are just looking to make sure you don’t overspend on hosting or skimp out and risk your digital storefront, the obvious solution is to work with a team of experts that can recommend, implement and set up the entire process.
Install WooCommerce
Now that you have hosting it’s time to install WooCommerce, which actually starts with installing WordPress.
Most hosting companies make it easy to set up WordPress with one-click installation. If the hosting provider you choose doesn’t have that option, your move is to download WordPress from WordPress.org and then follow the instructions at How to install WordPress.
Once your WordPress site is up and running, there are three ways to install WooCommerce to enable your ecommerce functionality:
Create a free account on WooCommerce.com. You can sign-up for a free account on WooCommerce.com. From there you can either (a) select a pre-installed solution with a trusted host, (b) auto-install WooCommerce if you already have a WordPress site, or (c) download the zip file and install it yourself.
Download and install WooCommerce plugin. Your second option is to download the WooCommerce plugin from WordPress.org and install it directly on your site. Once you’ve downloaded the plugin you’d:
- Navigate to your website
- Click on Dashboard > Plugins > Add New > Upload
- Select the WooCommerce plugin from your computer
- Click “Install”
- Click “Activate”
Search and activate the plugin from your site. The final option (which may be the easiest) is to install WooCommerce right from your site. To do this you’ll want to:
- Navigate to your site
- Click on Dashboard > Plugins > Add New > Search Plugins
- Search for “WooCommerce”
- Click “Install”
- Click “Activate”
Immediately following installation, regardless of which method you choose”, you’ll be prompted with a setup wizard. It’s strongly recommended by WooCommerce (and us) that you follow these steps to complete your initial setup.
Design Website
Michael Jordan once said that he played in a brand new pair of sneakers every single game, because he just loved the look and feel of a fresh set of kicks. This can be a great opportunity to take advantage of, in polishing or even completely revamping your store’s looks.
In most cases, you should be able to transfer most if not all of your old store’s data over to the new one so you’re likely to retain much of the formatting styles you had on the Shopify store. As WordPress and WooCommerce are extremely popular, there are a lot of themes and templates available. Most of these can easily be downloaded, installed and customized on your site without too much trouble.
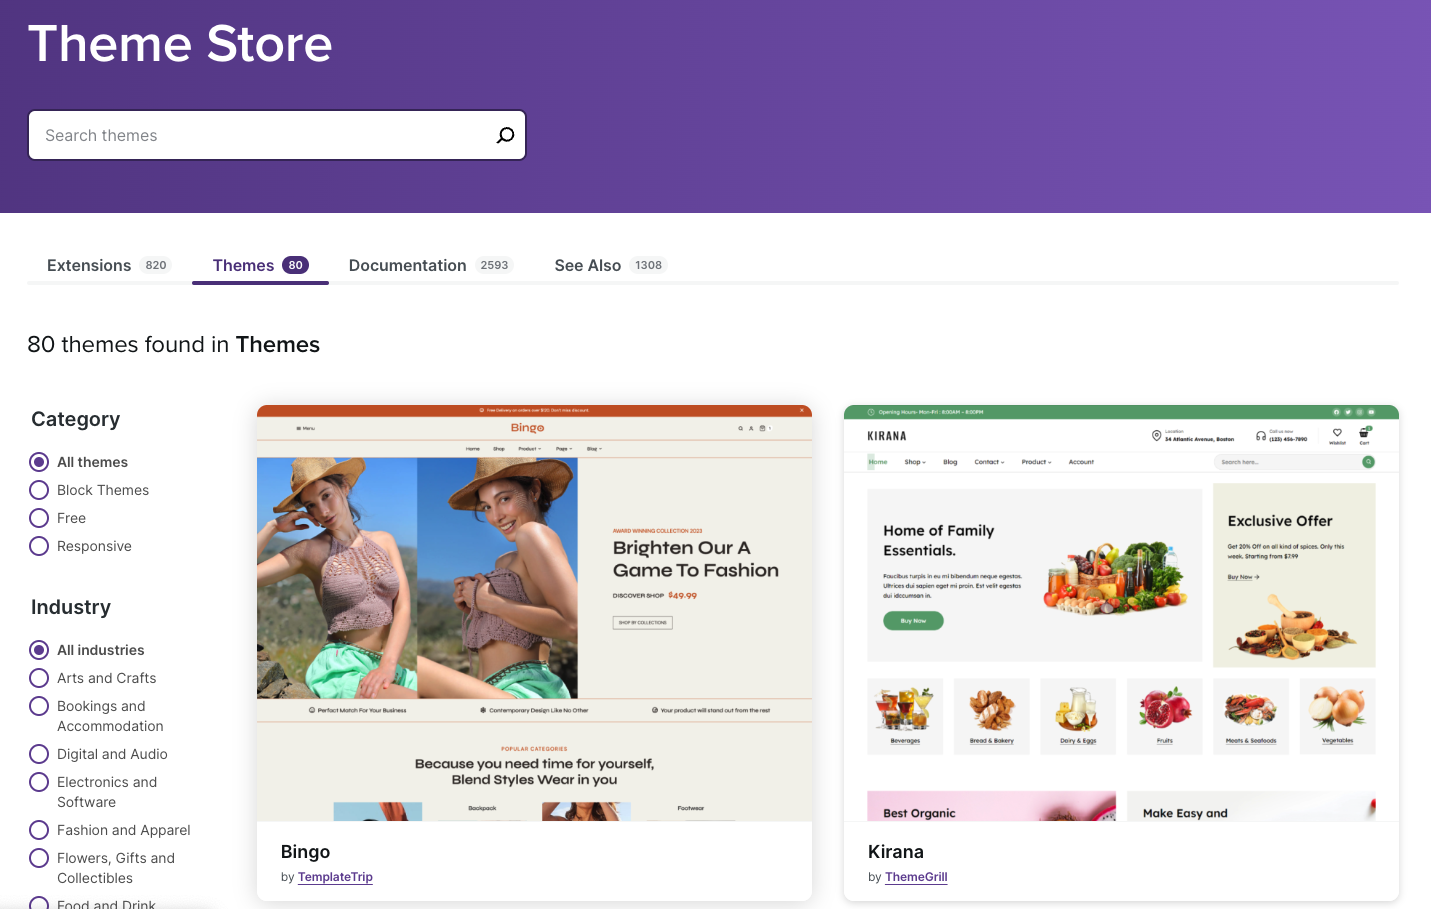
The WooCommerce Theme Store also has a bunch of filters that you can use to find a design closer to what your type of business can better benefit from. If you are however looking to provide your customers with a unique experience for the entire store or think it’s time for a brand refresh, you should consider working with a WooCommerce team of experts / developers to get a 1-of-1 website look that’s sure to make you stand out from the crowd.
Want professional help migrating your store to WooCommerce?
Contact us today to see if your store qualifies for our free, no-hassle data migration services.
Contact usChapter 3: Migration Methods Overview
Now that we’ve taken a look at the why of it all and also learned how to prepare for a successful migration, it’s time to see what the most common migration types are and identify what works best for you.
Manual Migration
While not a turn-key solution, manual data migration between Shopify and WooCommerce is really not that difficult. As with most data transfer methods, as long as you pay attention to what you’re doing (and this guide) it’s a fairly straightforward process.
The main thing to note here is that, due to Shopify export limitations, manual migration does not support, at this time, the transfer of product images or other custom content outside of the three primary data categories: products, customers and orders.
Migrating With a Tool
Migration tools offer a bit more flexibility when it comes to migrating your data, allowing you to transfer more than the manual migration does.
Depending on what tool you end up using and what your budget for such a solution is, you might actually end up doing close to none of the work.
You’ll find some recommendations below with options ranging from data migration pricing tools, expert migration services and customer support, each with its pros and cons.
If you’re iffy on trying out a data migration tool, remember that most of them have demo versions that you can try out and see a limited version of how your new WooCommerce store will look and feel, before having to pay anything.
Migrating With a Professional
Finally, if you’re really serious about your store migration being in the hands of a legitimate professional, you can use online resources like Clutch, DesignRush, Upwork or even Google to find a WooCommerce professional or agency that will help create and develop your vision for your new WooCommerce store.
There are a few things you’ll want to make sure you are aware of before picking an expert, read on to learn what they are.
Chapter 4: Manual Migration
Having already backed up your Shopify store data, it should be pretty much safe to start moving it over to your fresh WooCommerce store. The process itself might sound a little daunting but in reality, it’s fairly straightforward.
Export Shopify Data
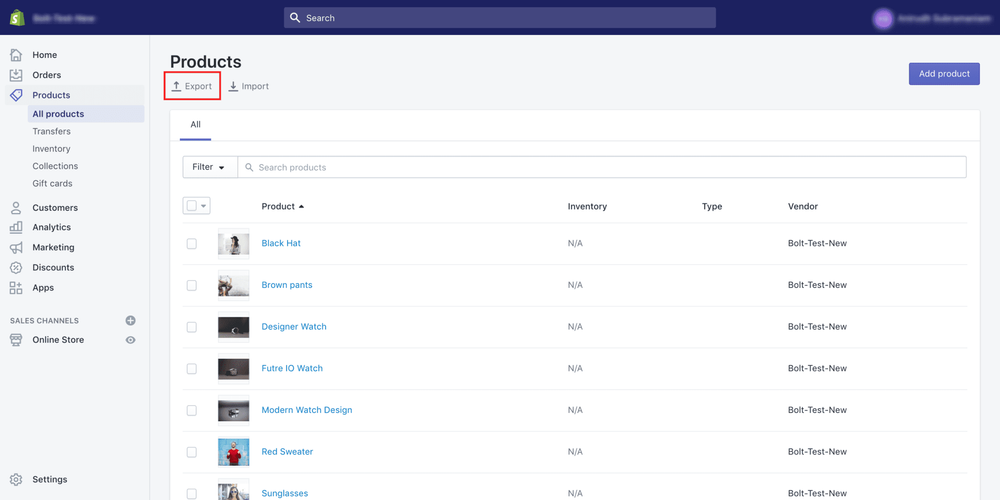
To export your customers, orders and products, head over to your Shopify admin panel, select the Products tab and then click the “Export” button above the product list.
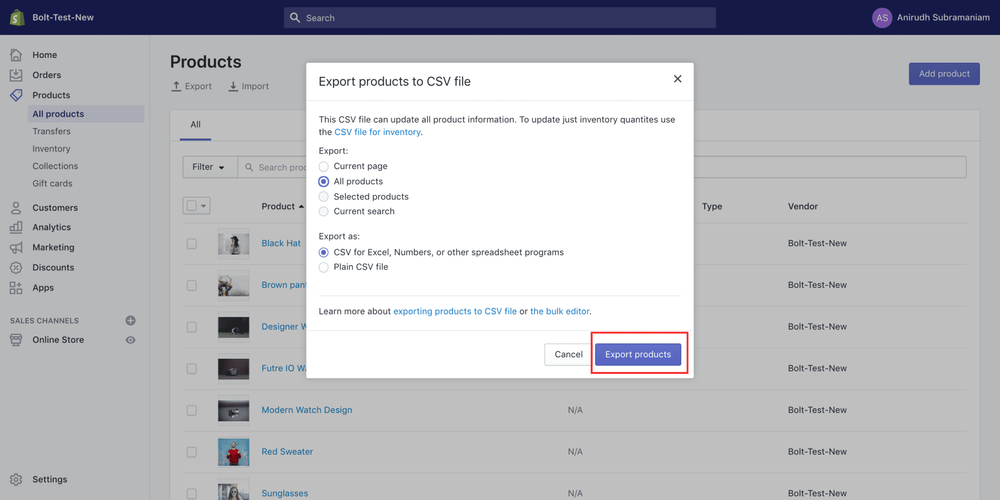
In the window that pops up, make sure to select “All Products” under the “Export” option set, as well as “CSV for Excel, Numbers, or other spreadsheet programs” under the “Export as” option set. Now click “Export products”.
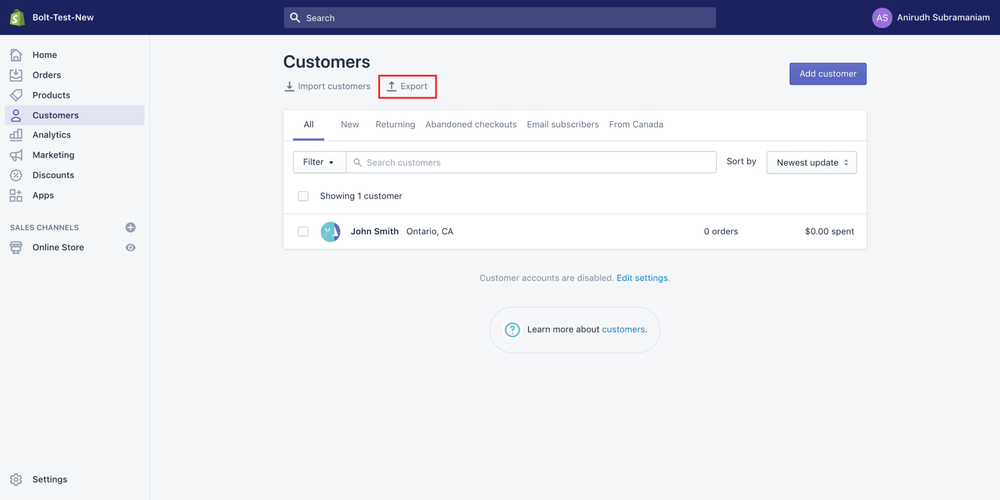
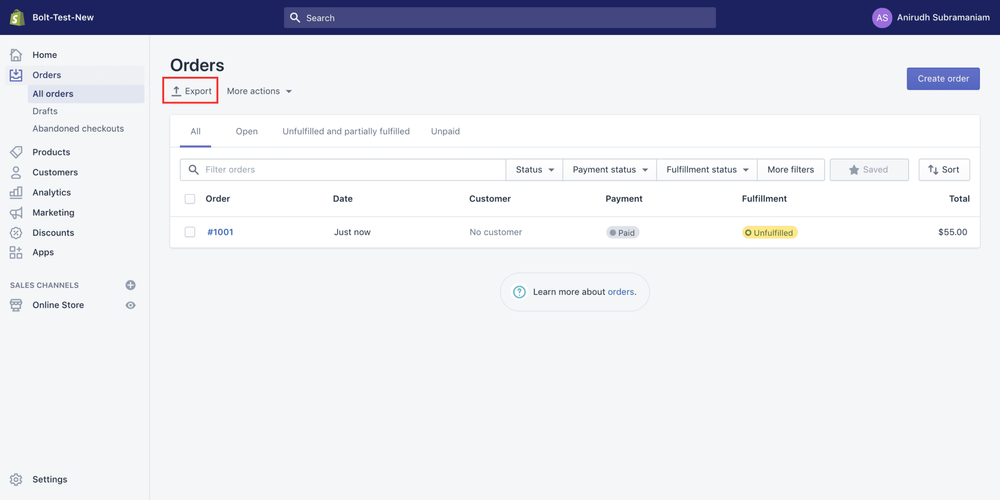
The resulting export CSV file will be sent to the email address registered as your Shopify account. Depending on the size of your inventory, it might take a little while for your file to arrive. You can now repeat the same process for customers as well as orders.
Once you’ve received all the CSV files in your inbox, go ahead and save them locally so we can move on to importing them into WooCommerce.
Import Data Into WooCommerce
It’s time to switch over to your WordPress dashboard. Click on “WooCommerce” to access your store and then select the type of content you’d like to import. Let’s say for example “Products”. Make sure you make the proper selection for each type of data that you’re importing.
Once you’re on the “Products” page, click on “Import” above the product list and you’ll be taken to the built-in product CSV import wizard which will help make the entire process much easier.
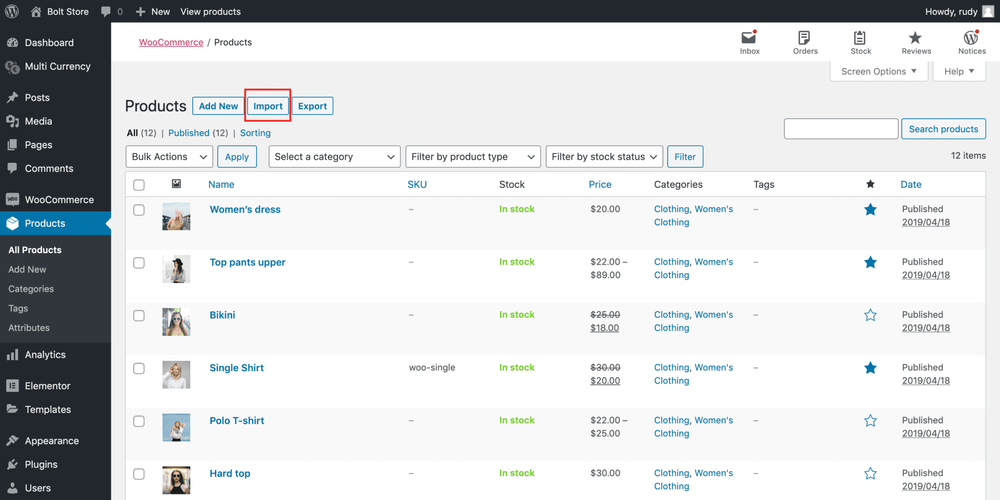
Now click on “Choose File” and select the appropriate file from the ones you previously exported from Shopify (for this example you would target the products CSV export file) and click “Continue” to move to the next step.

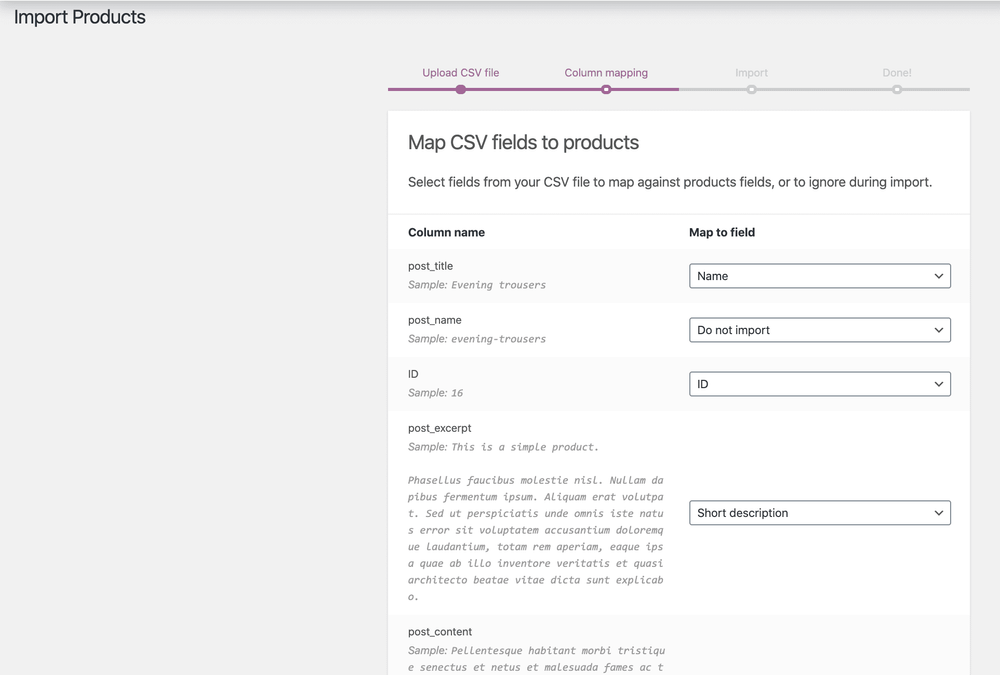
Next, you’ll be greeted by the “Column Mapping” step of the process. Provided that you’ve properly set up your WooCommerce store, most if not all of the column names will be automatically matched to the Shopify CSV file you uploaded but it’s always a good idea to double check that everything was pulled-in correctly and make any manual adjustments if necessary, using the dropdown menus on the right side of each row.
If there are any fields that don’t have corresponding options, you can go ahead and exclude those.
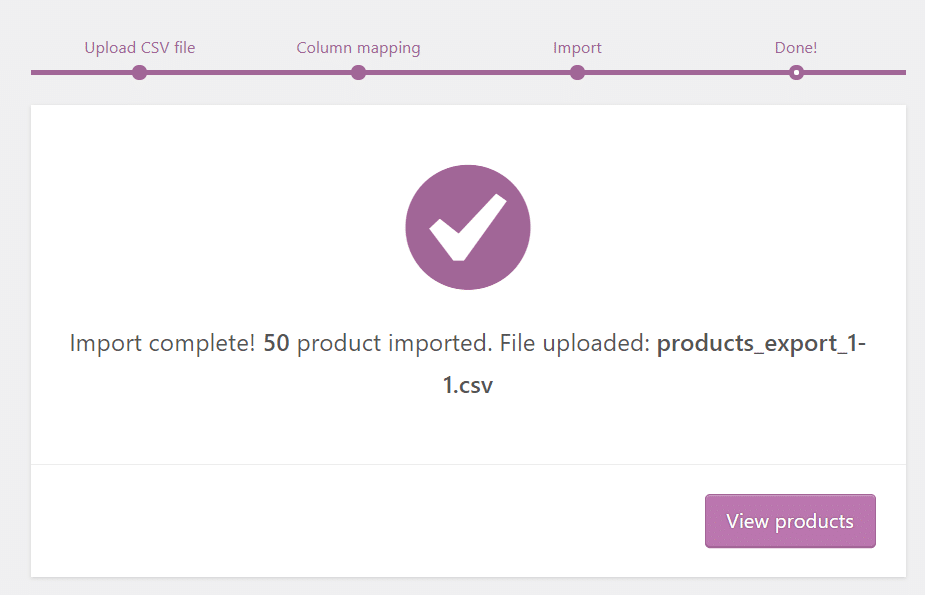
Once you’re satisfied with how everything looks, you can start the import process by clicking on “Run the Importer”. Be aware that, depending on the size of the data being imported, it may take awhile for the process to be complete.
When the process is done, the window will display a success message. You can now check what data has been pulled in by clicking on “View products”. This will redirect you to the “All Products” tab. Repeat the process for the other data files you downloaded from Shopify.
TIP! Remember that WooCommerce doesn’t import product images so you’ll have to upload those manually. An extra checkup on each product is also recommended to make sure no critical information is missing.
Chapter 5: Using A Data Migration App
List of data migration tools
There are a bunch of Shopify to WooCommerce data migration tools that you can consider, like SWM, MISW, Shopify to WordPress Importer, WP All Import, ExportYourStore, Next Cart, Product Import Export for WooCommerce but only a few offer a complete A-to-Z process that takes you through everything you need to do to ensure a safe migration, some handle only the bigger lift while indicating what else you need to do in order to complete the migration.
Because we’ve already outlined the manual migration process, which itself isn’t terribly difficult to run through, we’ll focus on the three main recommended migration tools that you’d want to consider. These are Cart2Cart, Litextension and S2W.
Migrating with Cart2Cart
Introduction
If you’ve chosen to migrate your store using a migration tool, know that for the most part, the process will be similar between all of the apps available. Most services provide you with two primary options, either get a quote for the cost of migrating your store using the tool and then proceed to run through the process with it, or spend extra to have one of their experts complete the process, which will still require you to provide certain credentials and login information to them.
Migration Pricing Tool
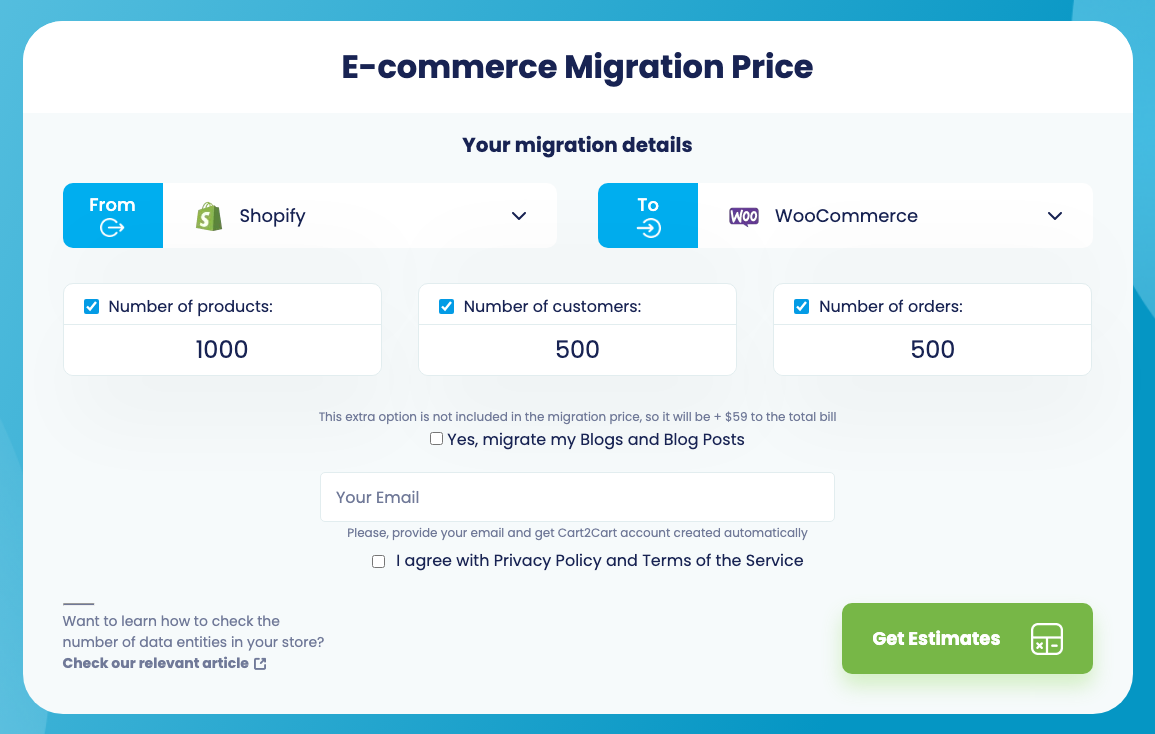
With Cart2Cart, you have the option to use the migration pricing tool and get an estimate sent to you via email, depending on the number of products, customers and orders that you’ll move over. They also offer Blog migration for an extra cost.
First choose the source app (Shopify), then the target app (WooCommerce), then proceed to change the number or products, customers and orders your store has and, if you also have a Blog you’d like to move over, check the box next to “Yes, migrate my Blogs and Blog Posts”.
Once you’ve entered your email address and checked the second box next to “I agree with Privacy Policy and Terms of Service” (you can find both in the website footer) all you have to do is click the green “Get Estimates” button and wait for your email to arrive.
TIP: If you’d like to test out the tool before making any purchase, you can still go through the migration process using a demo version, which will only transfer a few items from Shopify to WooCommerce and then give you the option to continue to a full transfer once you’ve purchased a complete migration.
You can find this tool here.
Sign Up
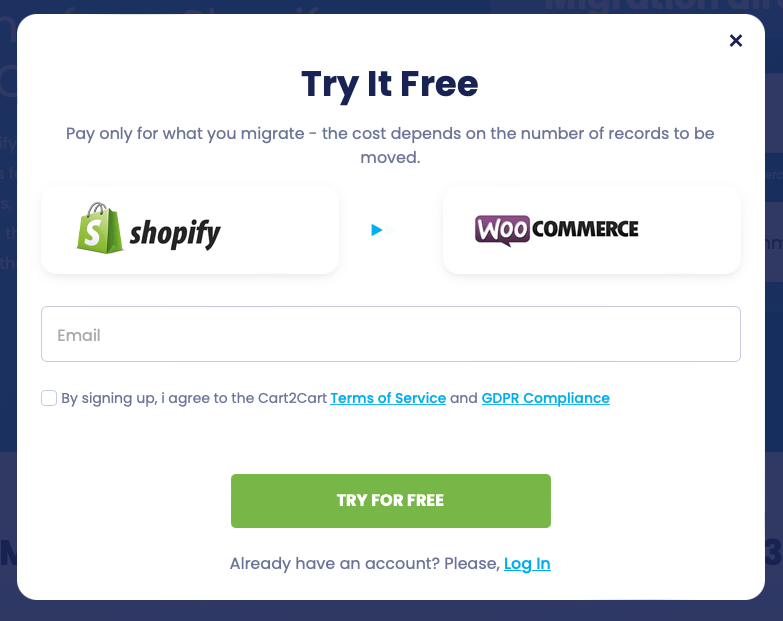
To start the migration process, access the Shopify to WooCommerce migration page on the Cart2Cart website here and click on the green “Try It Free” button in the navigation bar or on the page.
Input your email address in the window that pops up and check the box underneath to confirm you agree with the Terms of Service and GDPR Compliance, then proceed to click on the “Try For Free” button below. If you happen to already have an account, simply use the “Log In” button at the bottom of the popup.
Your login credentials will be sent to your email address and you’ll be automatically redirected to your account dashboard.
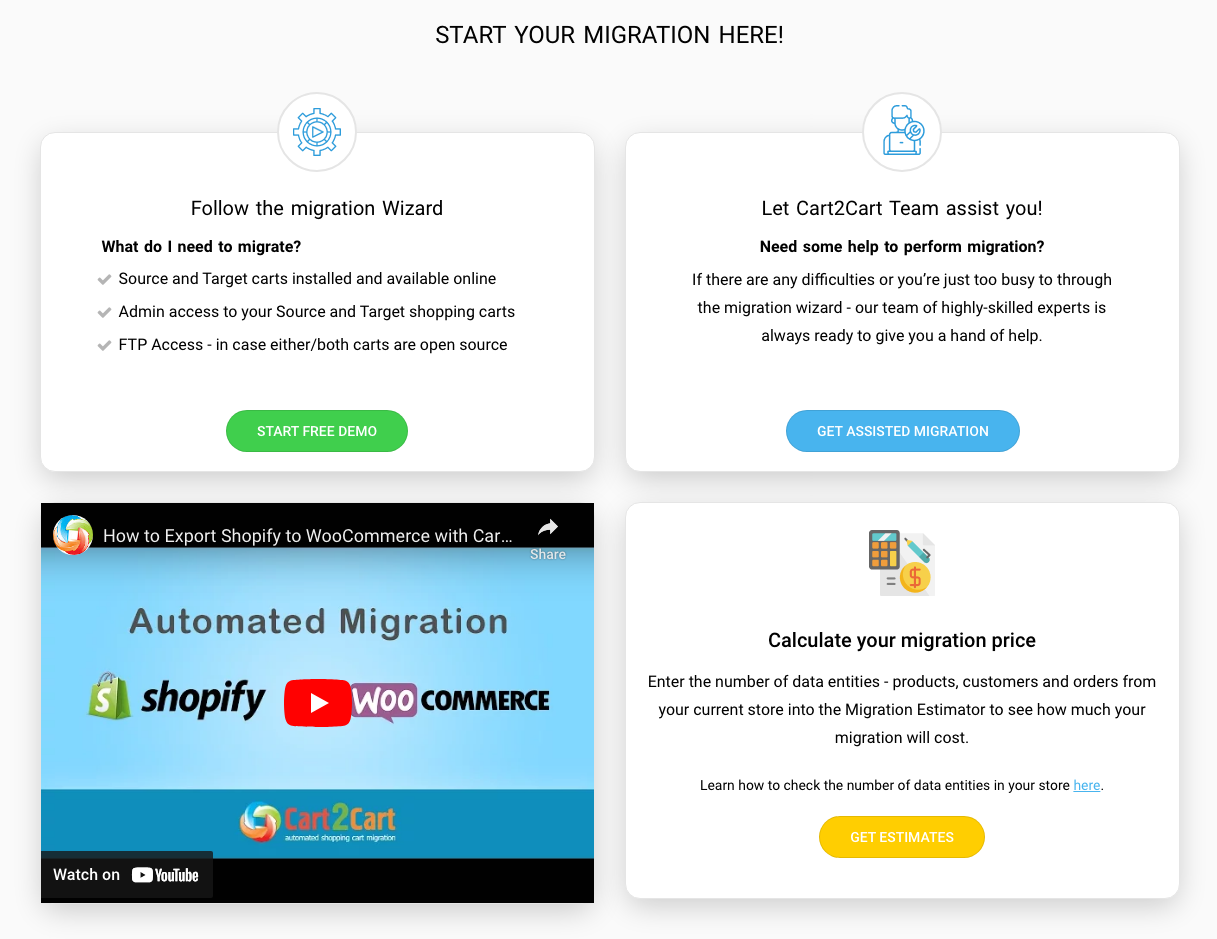
Once you’re on the dashboard page, either by being redirected after signing up, or my logging in later using the credentials received through email, you can click on the green “Start Here!” button to access the Free Demo migration, to request an assisted migration or to calculate your migration price using the tool mentioned earlier. You’ll also find an embedded video with instructions on how the process works.
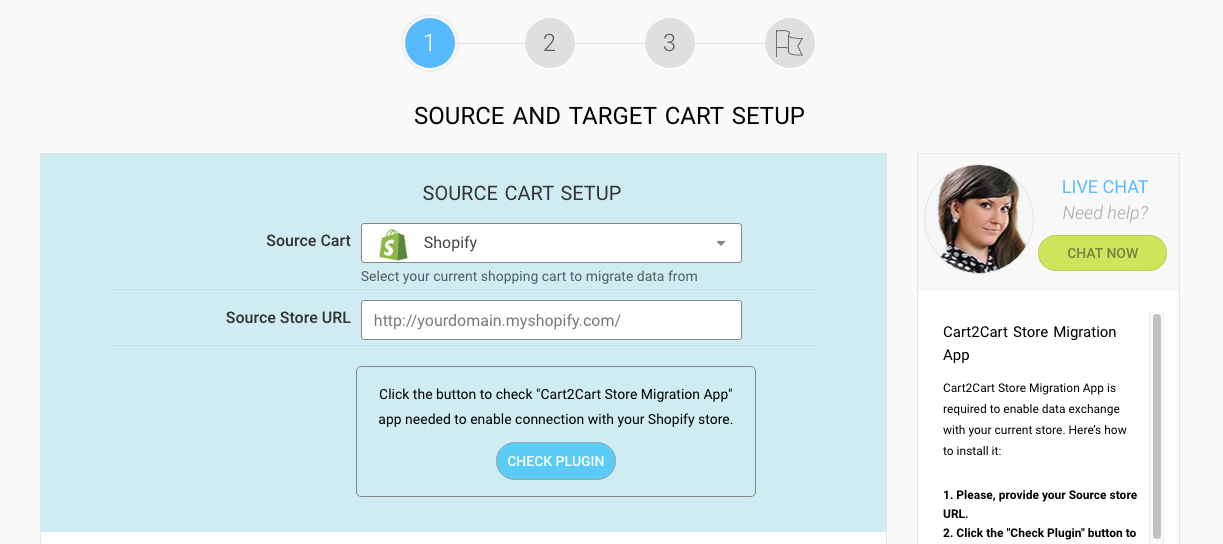
Set up the source cart
Alternatively, if you feel you’re good to go with the actual migration, select “Create Migration” from the navigation bar and then “Create Migration” from the dropdown menu.
Once you select Shopify in the “Source Cart Setup” section, you’ll need to also provide your Shopify store URL and API Password. You can find the Shopify store URL by accessing your Shopify account dashboard, clicking on “Settings” and then “Domains”. If there are multiple entries, look for the one ending in myshopify.com and copy that one. Getting your API Password requires some tinkering.
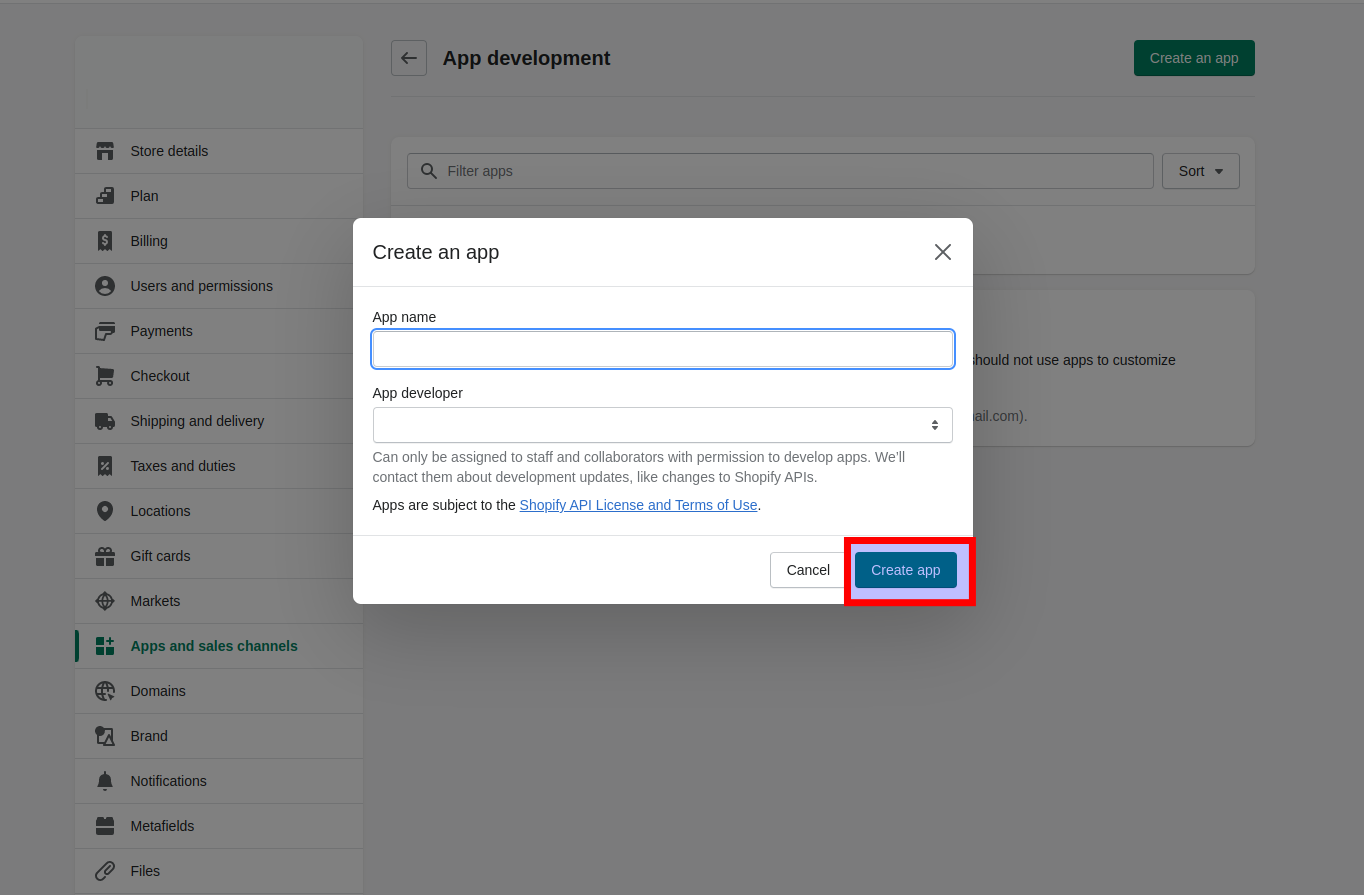
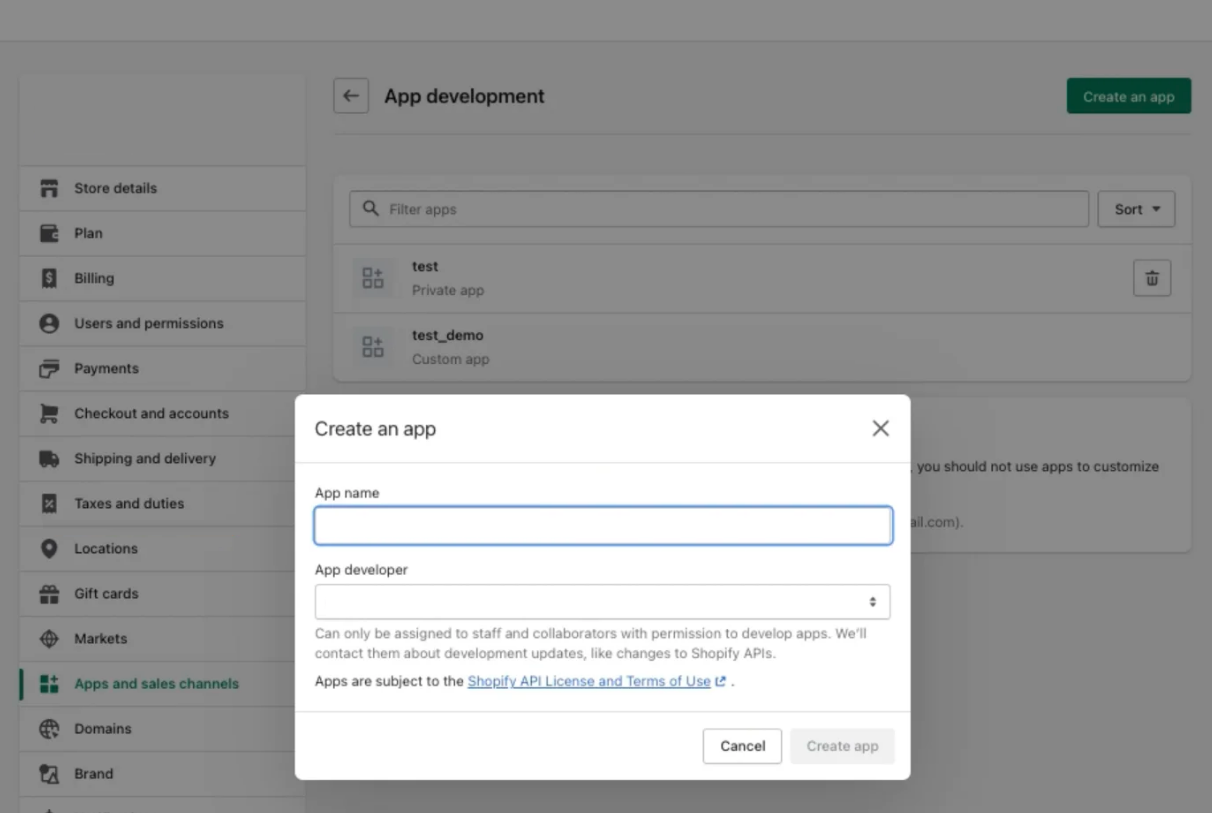
Head over to your Shopify administrator dashboard and navigate to “Settings”, then “Apps and sales channels”, then “Develop apps” and finally click on “Create an app”. Give your name a suggestive name (for this process let’s say Cart2Cart), and then click on “Create app”.
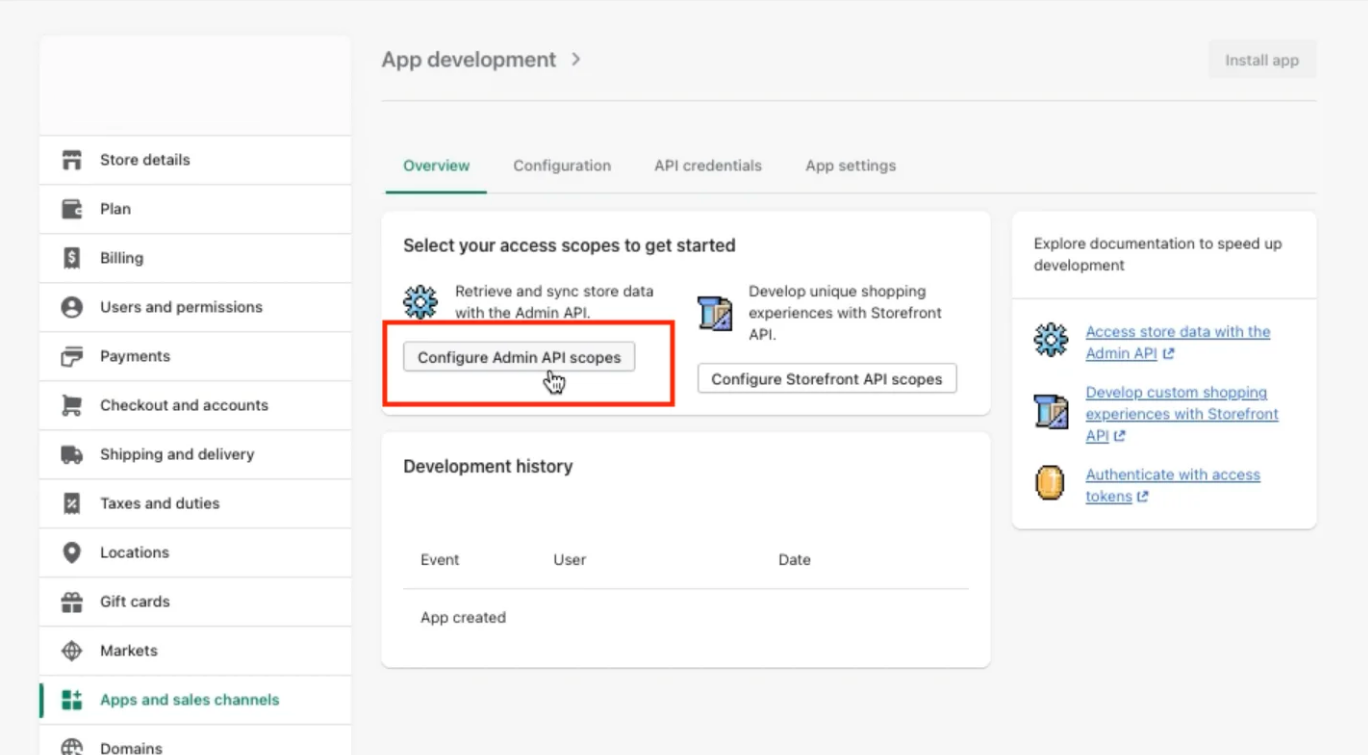
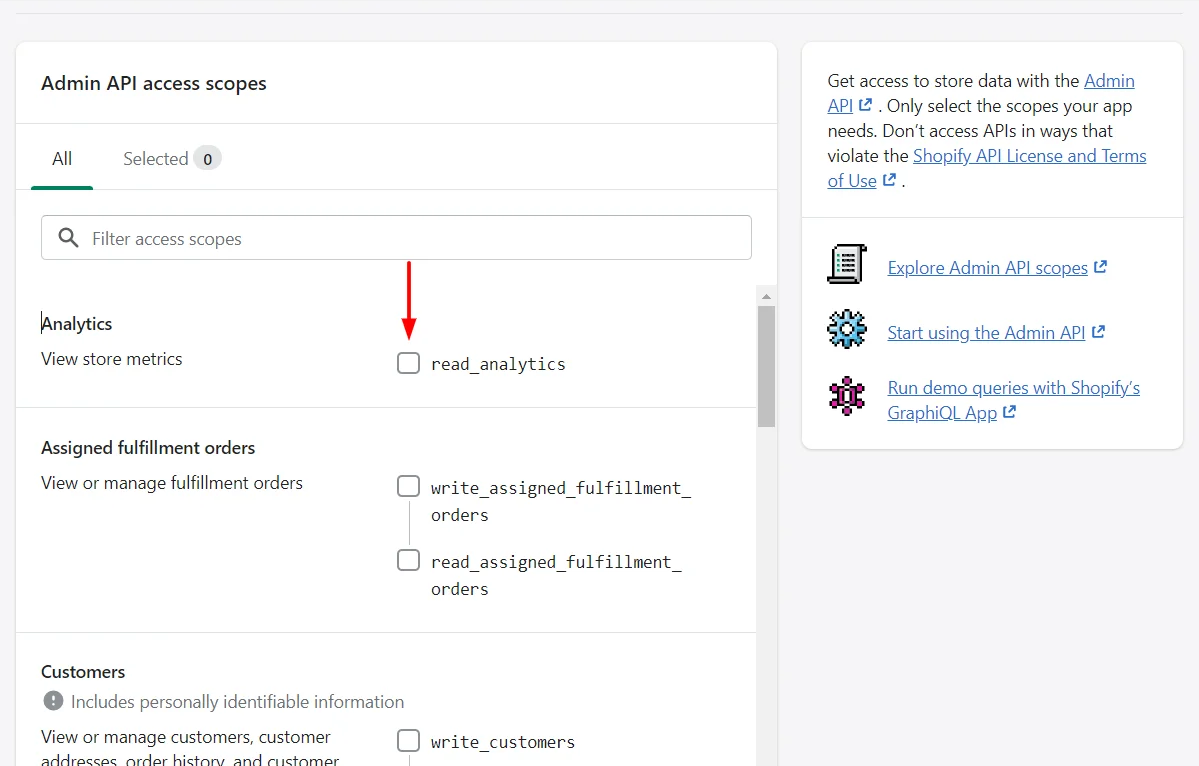
Next, choose the “Configure Admin API scopes” and tick all the boxes on the resulting page, then click the “Save” button.
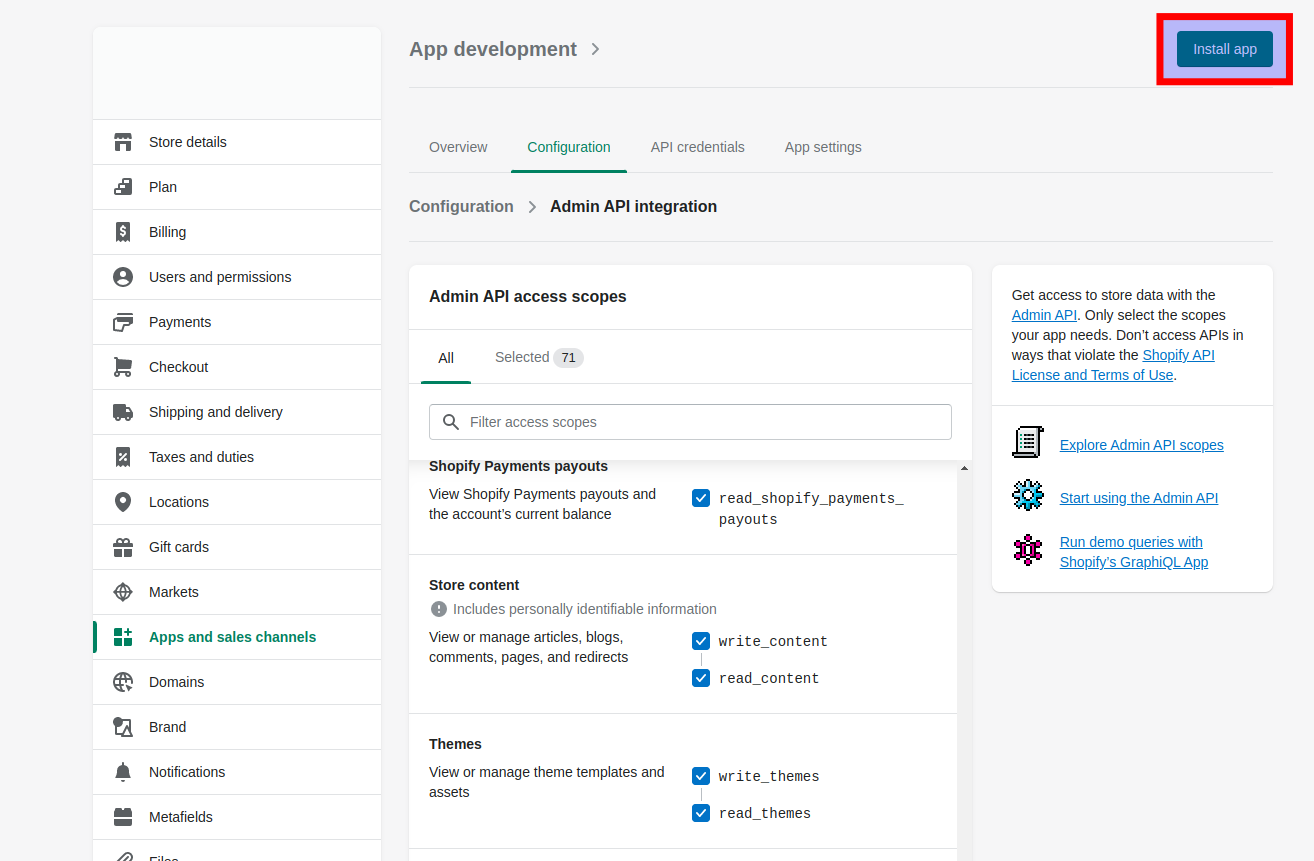
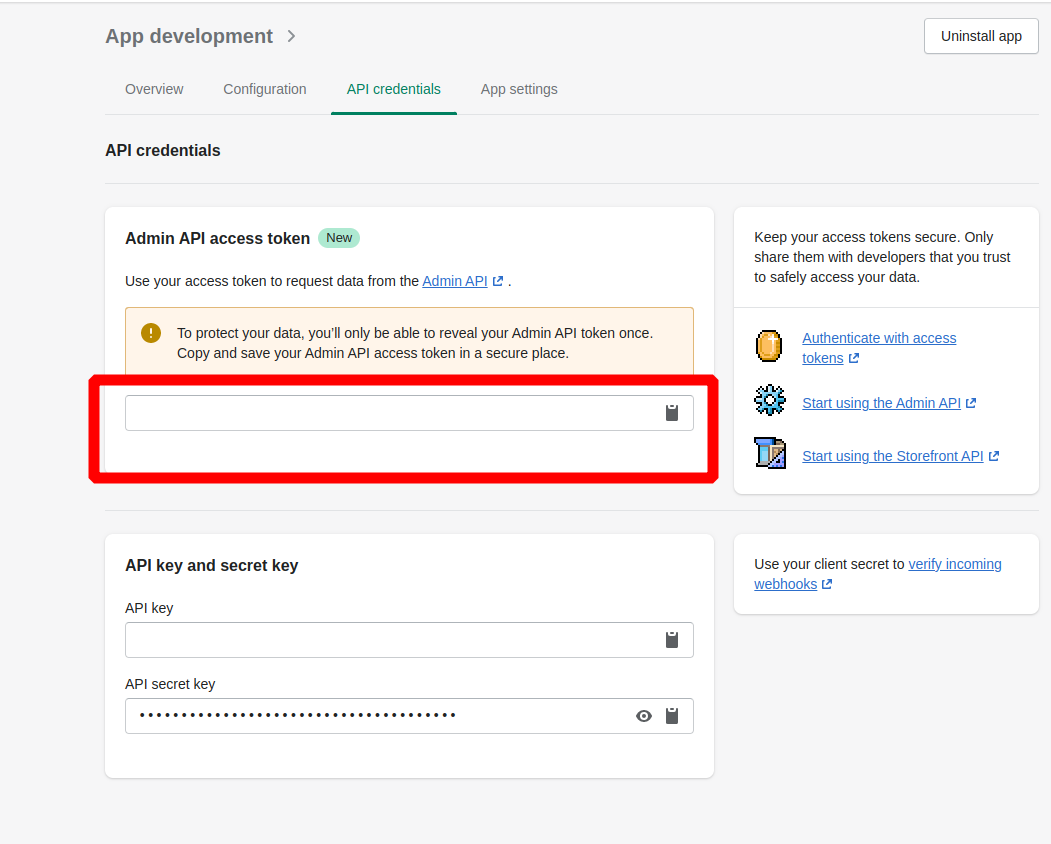
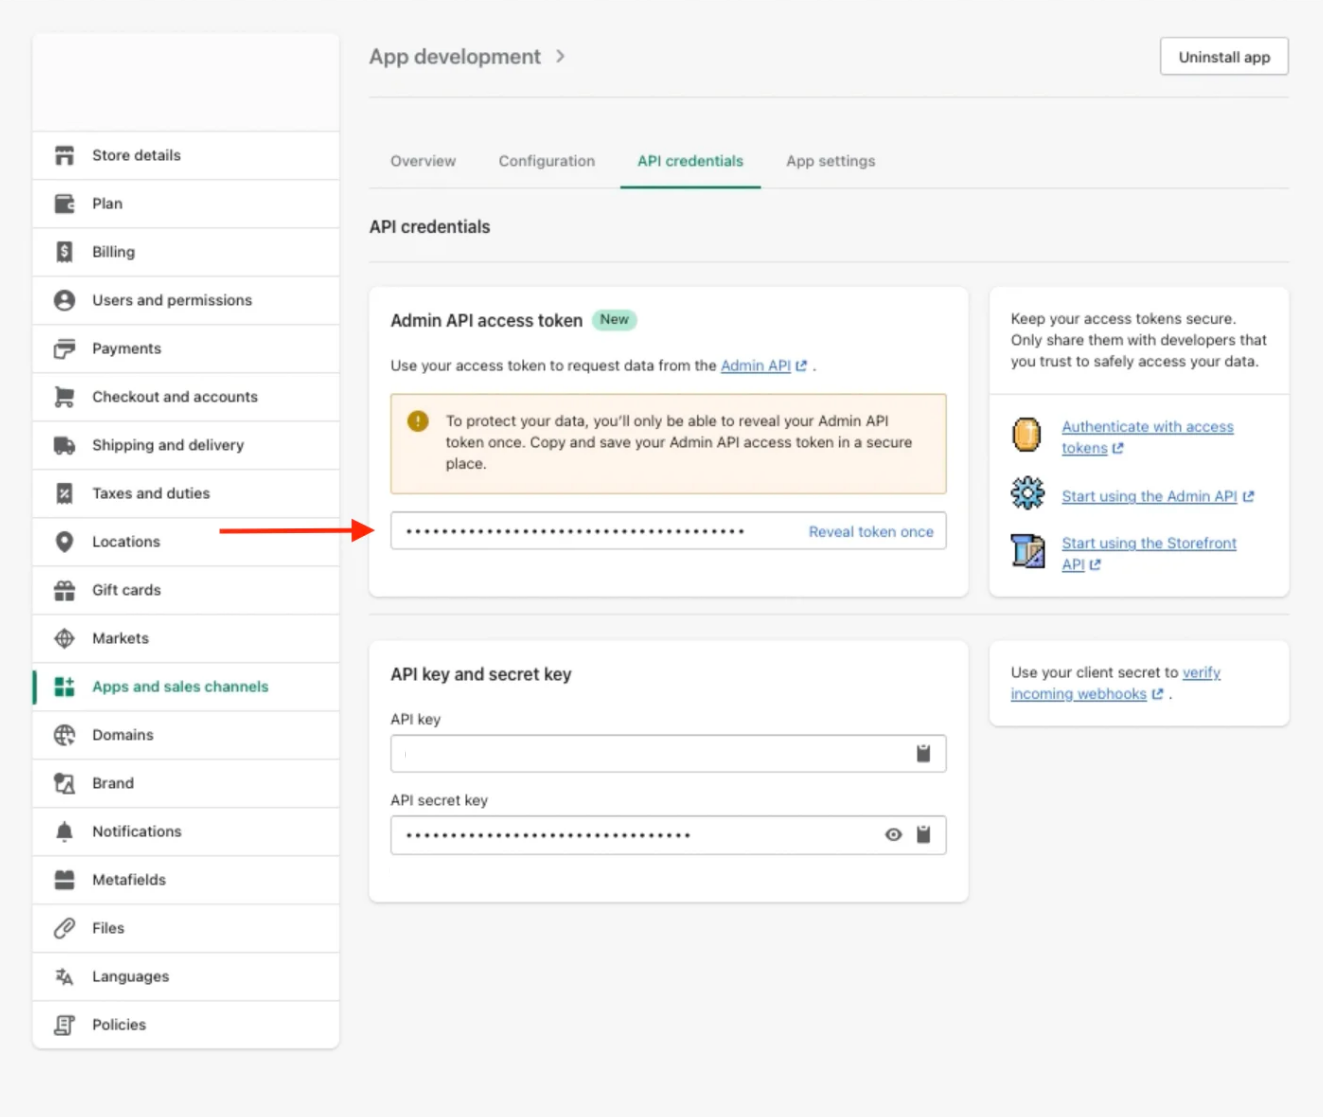
You can now click on the blue “Install app” button in the upper right corner and then navigate to the “API Credentials” tab to get your Admin API access token, which you’ll need to copy and paste in the Cart2Cart setup wizard.
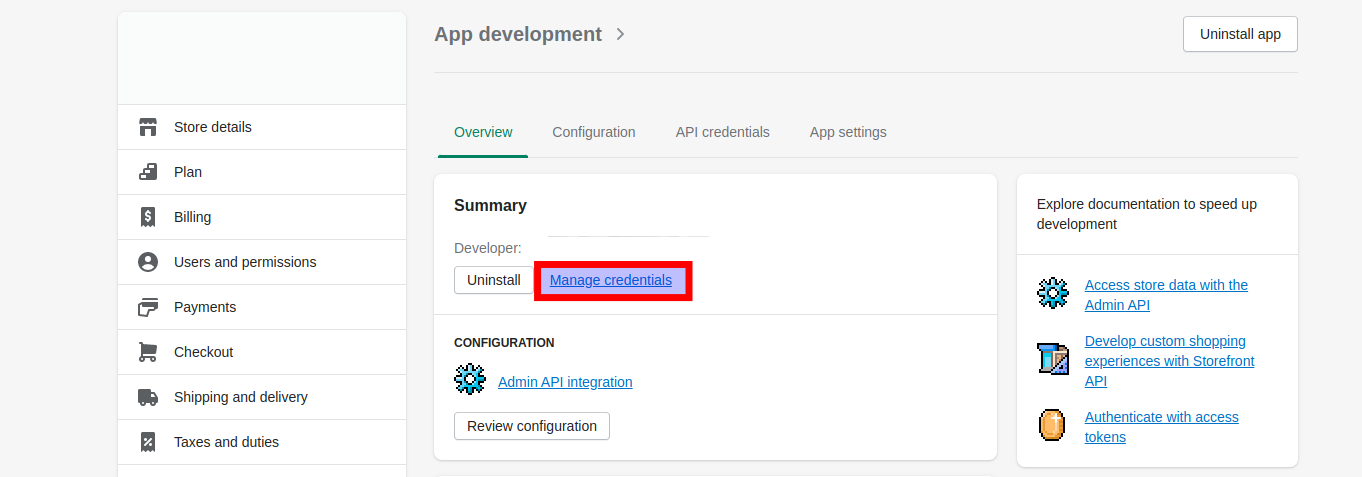
If the Admin API access token has already been created, log in to your Shopify store dashboard, navigate to “Settings” then “Apps and sales channels”, “Develop apps” and finally to “Create an app”. Now select the custom app that already exists and click on “Manage credentials”.
TIP: Shopify security only allows you to reveal your Admin API token once so make sure you save it in a secure place. If you need to create a new API token, press the “Uninstall app” button in the upper right corner, then “Uninstall” to get the new token.
Now, let’s return to the Cart2Cart wizard. Once you’ve added your Source Store URL, go ahead and click on “Check Plugin” and then paste the API token from Shopify into the API Password field.
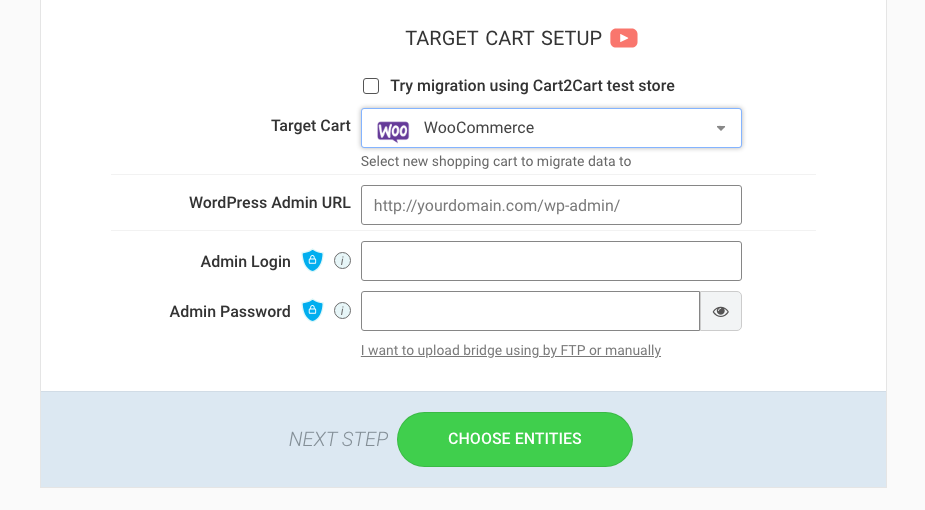
Set up the target cart
This one requires less fuss, you just need to provide the wizard with the Admin URL of your WordPress installation (the link to the page where you log in as an administrator, usually something like https://yourdomain.com/wp-admin/) then also type in your administrator username and password.
If all information has been correctly added, you can now click on the green “Choose Entities” button below to move on to the next step.
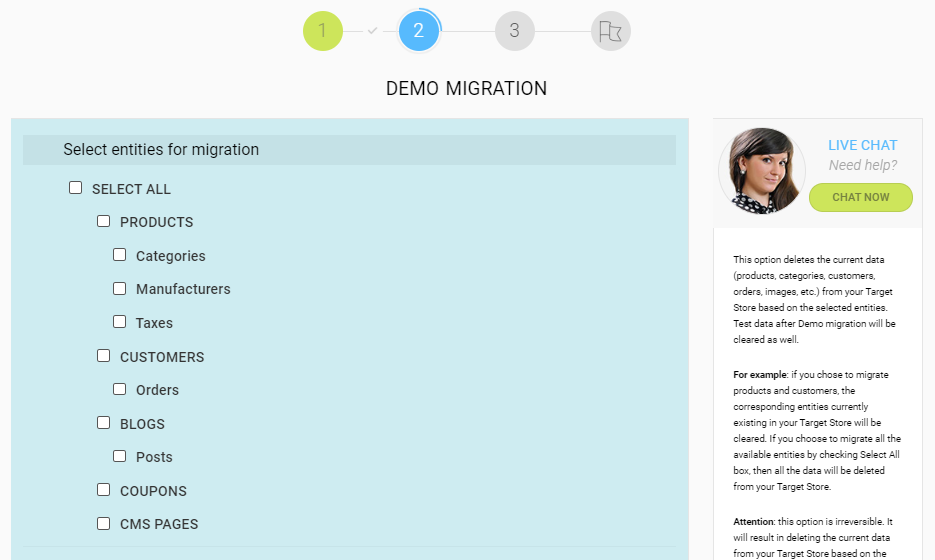
Choosing what moves over
On the second step of the wizard, you’ll have to select what types of data are going to be transferred from Shopify to WooCommerce. The default migration selection is the Demo Migration which Cart2Cart strongly recommends you do before attempting a full migration.
TIP: Demo Migration is a free option that allows the transfer of up to 10 entities in roughly 30 minutes. This allows you to check how the service works and take a look at your store on the new platform before paying for the service. The Demo Migration can be skipped by checking a box at the bottom of this step. It is also important that you do not close your browser window while any data transfer is in progress.
You can move over products, orders, customers and blog posts in the primary options section by checking each box in the migration wizard.
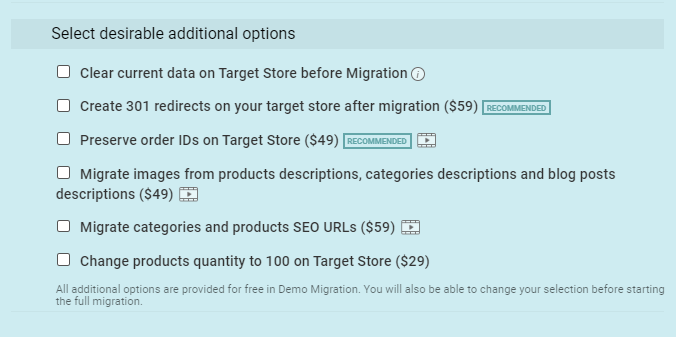
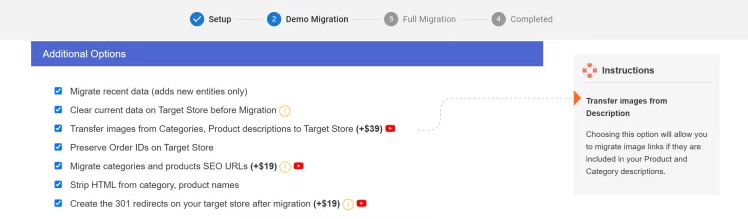
You can also opt-in for additional features depending on your needs. These are not mandatory but might help you skip a large chunk of extra work for integrating your store depending on your budget and store size.
Most of the extra paid features have videos or information that you can consult before selecting them.
The Cart2Cart wizard also allows you to map Shopify order statuses and customer groups to correspond to the ones on the WooCommerce store, should you have need of this. The service is also part of step number two.
You can select mapping options for each category by clicking the blue button on the right side and then choosing the target orders or customer group status from the dropdown boxes next to each source status.

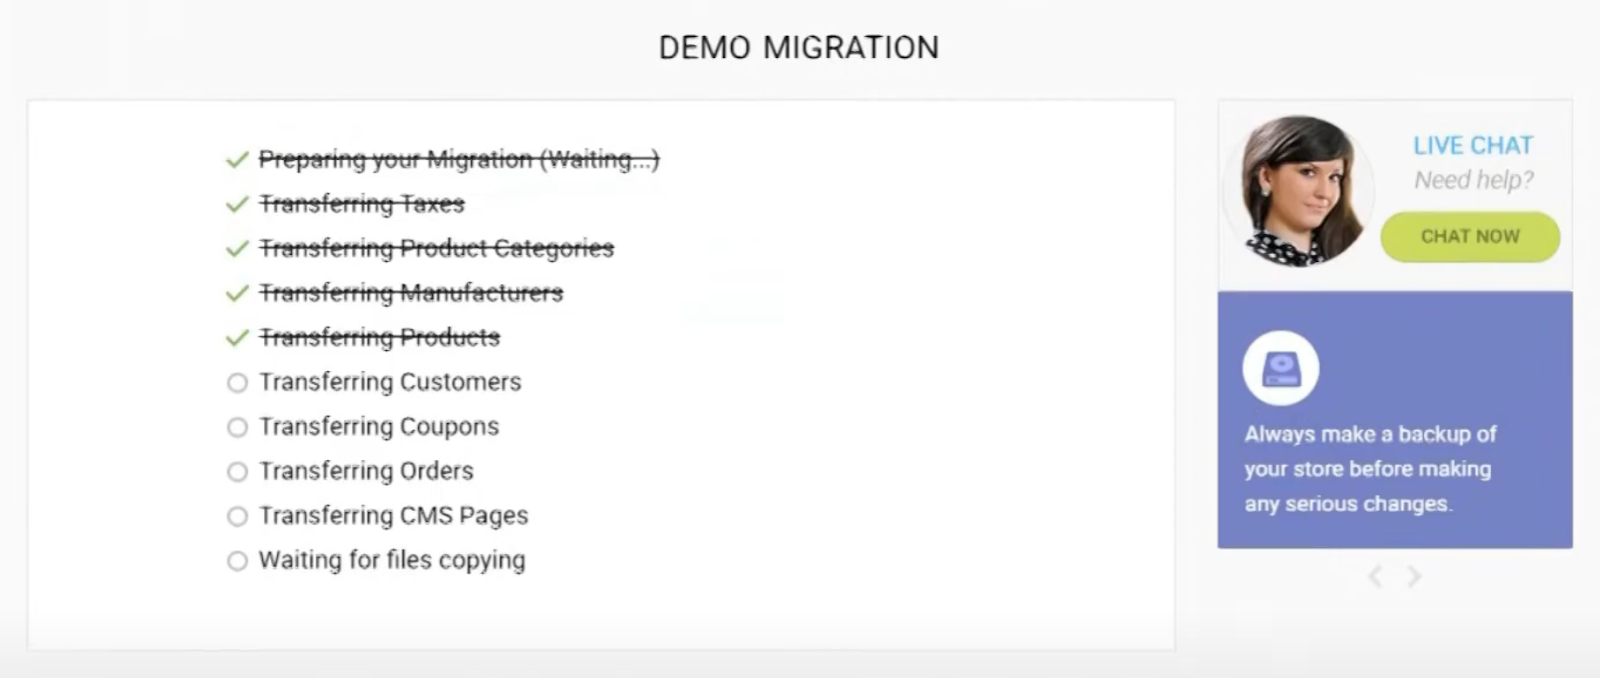
Once you’re ready to start the process, click on “Start Free Demo” (unless you’ve decided to skip the demo migration by checking the box above the green button) and the browser will indicate each data section that is currently transferring from the source cart.
TIP: If you chose not to skip the Demo Migration, it’s important to thoroughly check your store and make sure results are satisfactory. Also, a reminder, keep the transfer window open while migrating your store, it’s only safe to close once the transfer confirmation is displayed.
Finalizing the migration
When the migration is complete, you’ll be redirected to the third step where you can find a link to checking the results and indications for moving into a full migration (unless you skipped the demo migration).
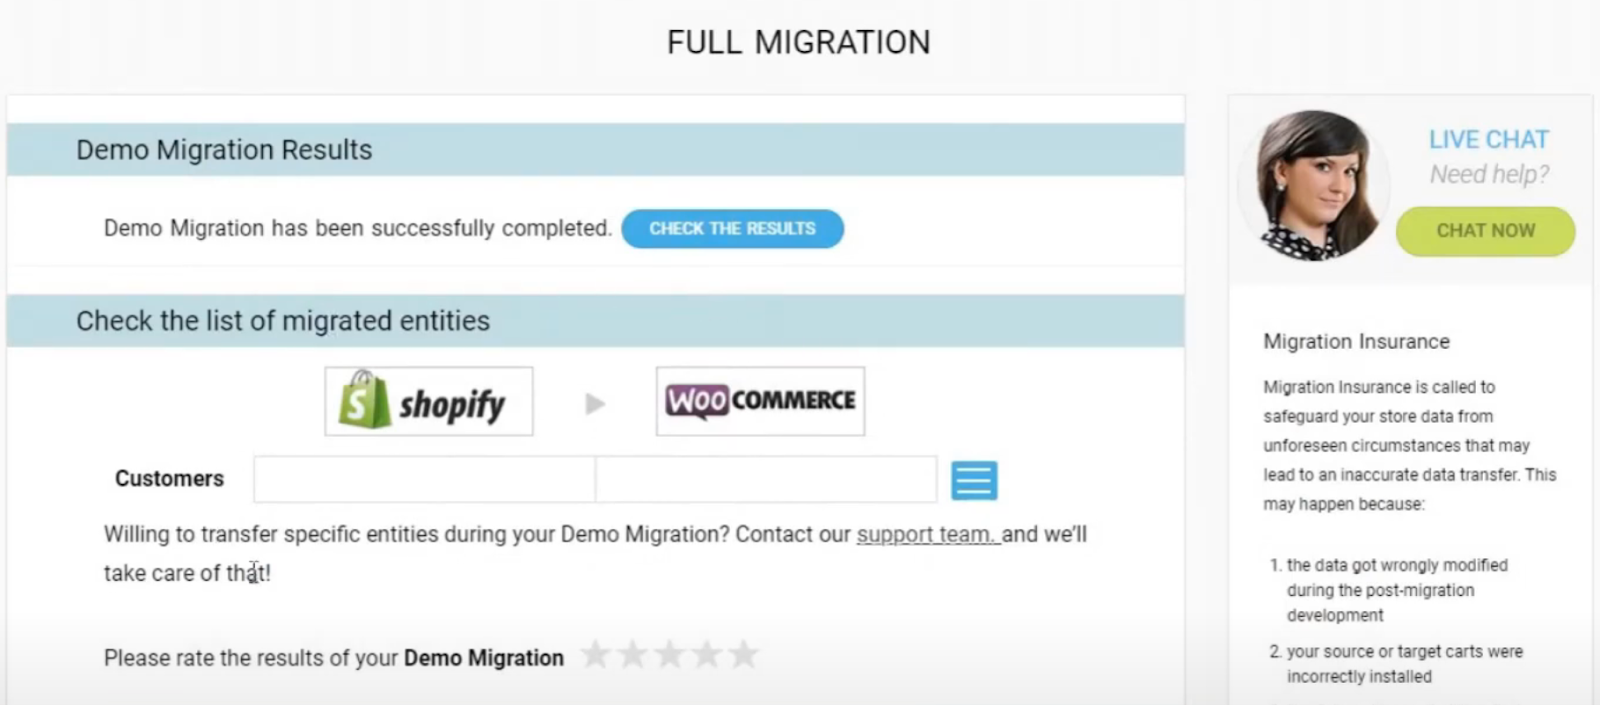
Migrating with Litextension
Introduction
As is the case with most cart migration tools, Litextension also recommends running the migration in demo mode, but you can also skip it. As a note, Litextension runs a cloud-based transfer of data so if you’ve attempted a cart migration before, that required keeping the browser window open during the transfer, that’s not the case here.
Migration Pricing Tool
You can use the migration pricing tool here to get a price estimate, based on the number of products, orders, customers and blog posts that you need to transfer.
First select your source store (Shopify) then your target store (WooCommerce) and fill in the input boxes with the number or products, orders, customers and blog posts that you’re looking to migrate. Click on the orange “Start Calculating” button and multiple results will appear below.
The “Basic Migration Package” will cover your basic needs while the “All-in-One Migration Package” basically means a Litextension expert will handle the migration for you.
TIP: You can perform a Free Demo Migration and check on how your store looks before paying for a full migration. The Demo Migration allows for up to 20 products, 20 customers and 20 orders to be transferred. This is a good way of identifying any possible issues and talking to Litextension support on how to handle them before purchasing a full migration.
Sign Up
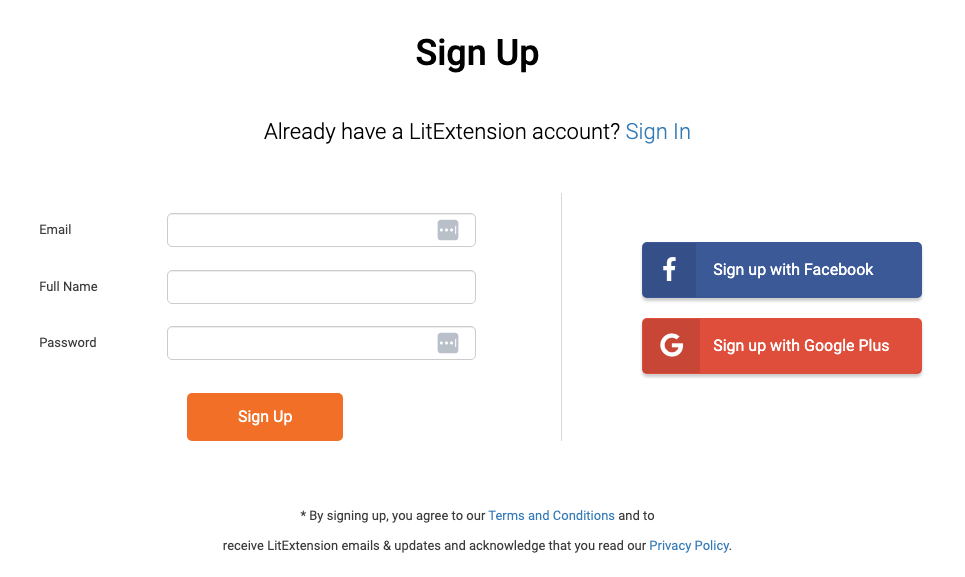
First you have to create an account on the Litextension website, here. Then click on the orange “Create New Migration” button in the upper right corner of the screen.
Set up the source cart
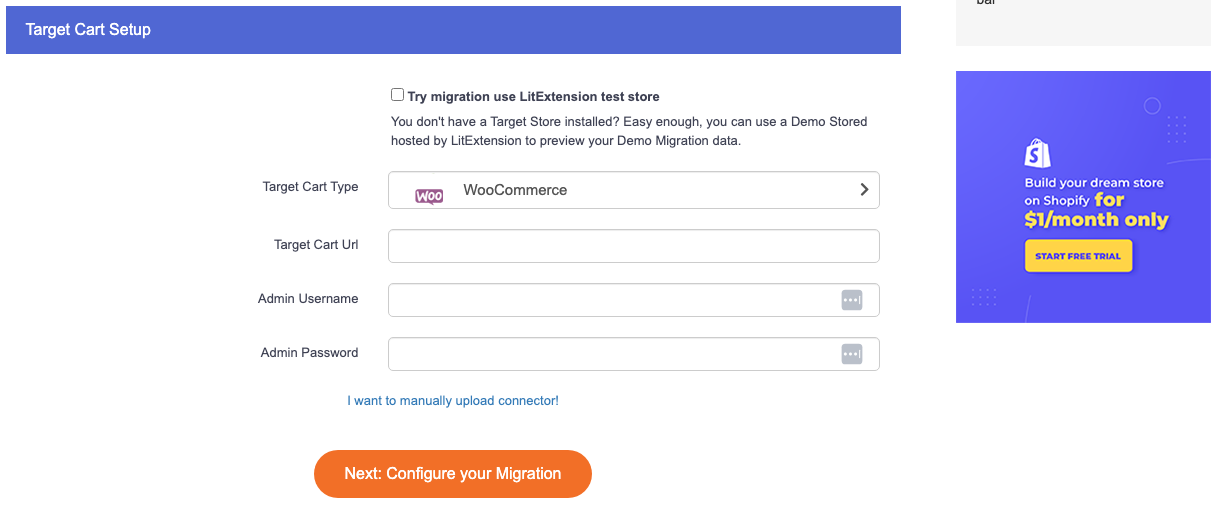
In the “Source Cart Setup” section you’ll first need to select the source cart type (Shopify) in the drop-down list and then fill in your Shopify website URL in the corresponding input box. You can find the Shopify store URL by accessing your Shopify account dashboard, clicking on “Settings” and then “Domains”. If there are multiple entries, look for the one ending in myshopify.com and copy that one.
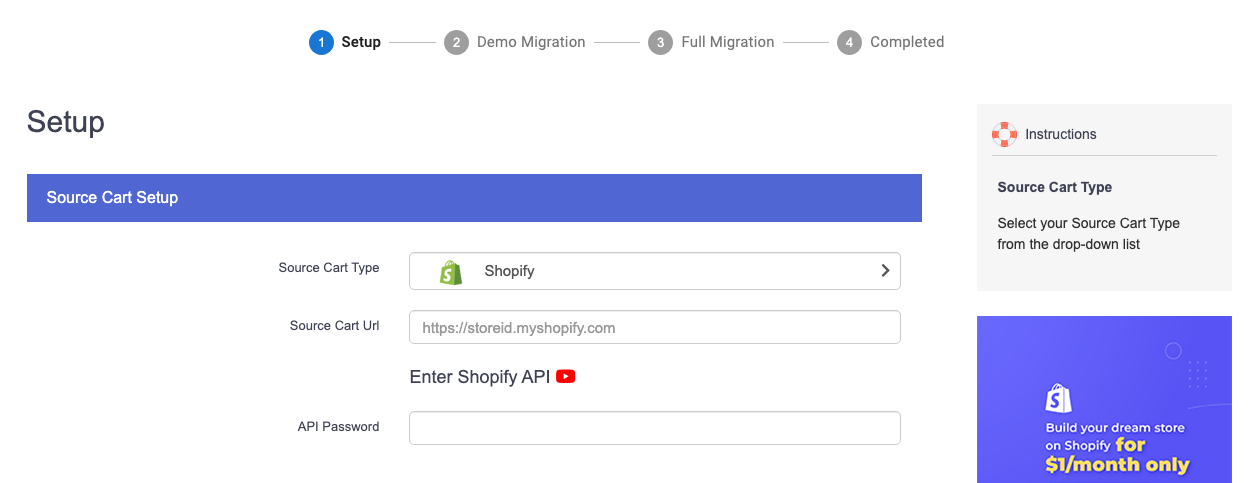
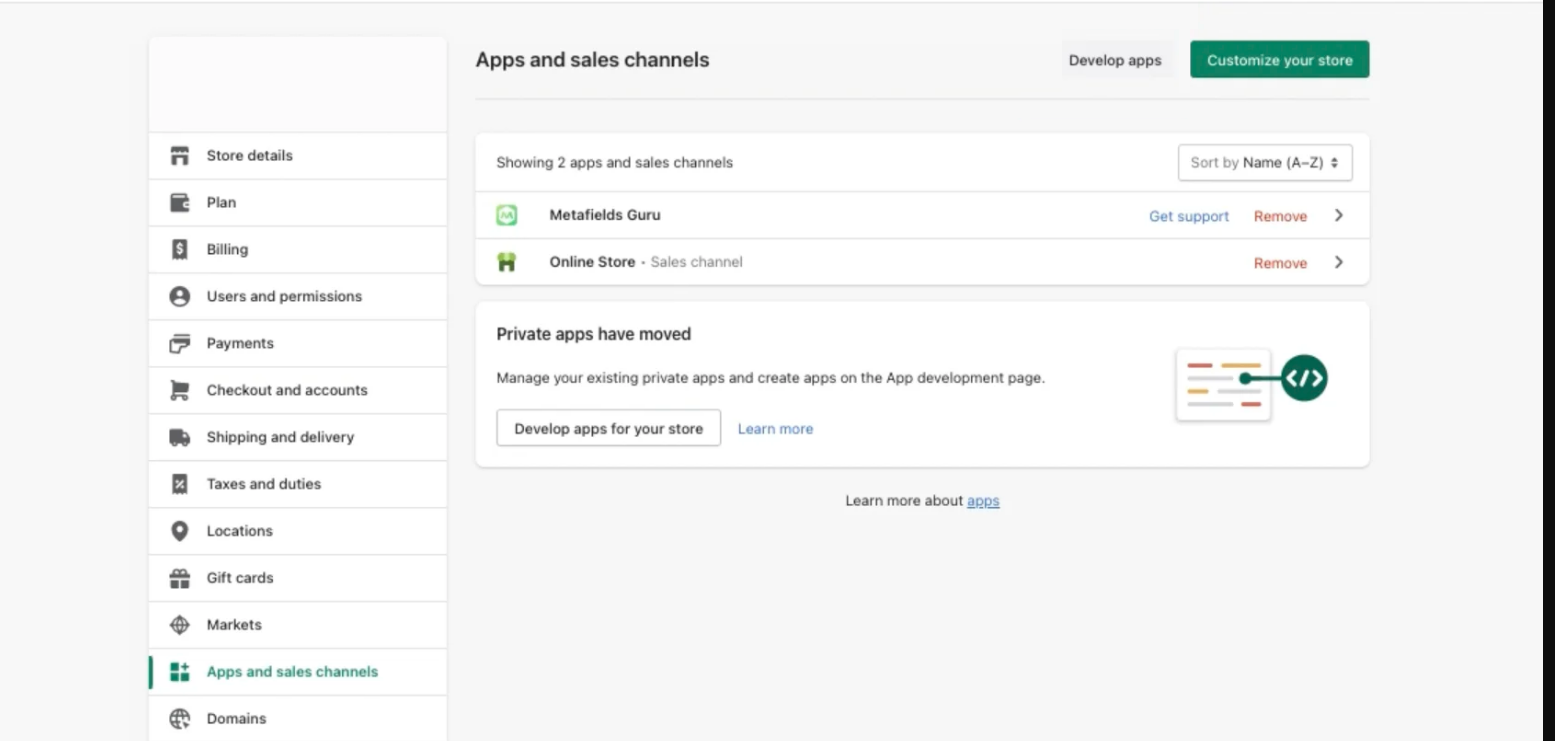
Below that, you’ll need to enter your Shopify API Password, to obtain this, you’ll need to navigate over to Shopify and access your account dashboard. Once there, click on “Settings” and then on “Apps and sales channels”.

Now, click on the “Develop apps” button in the upper right corner of the screen.
On the resulting page, click on the “Create an app” button in the upper right corner and then type in a name for your app. Confirm the app creation by clicking the “Create app” button in the lower right corner of the popup window.
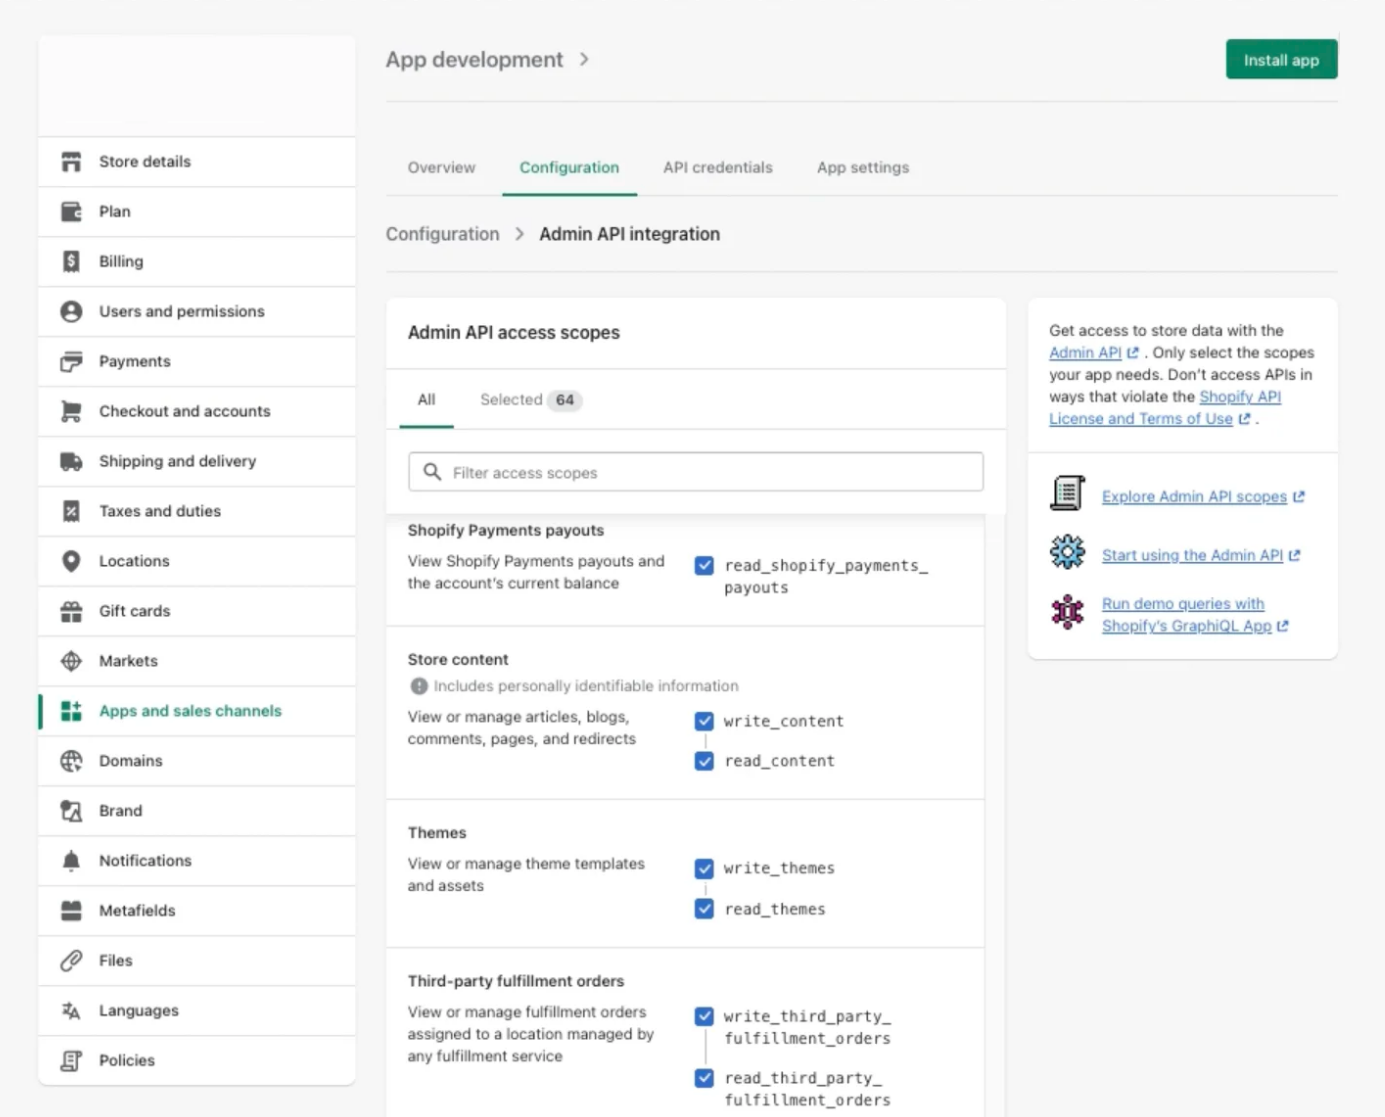
The next step is to click on “Configure Admin API scopes”.
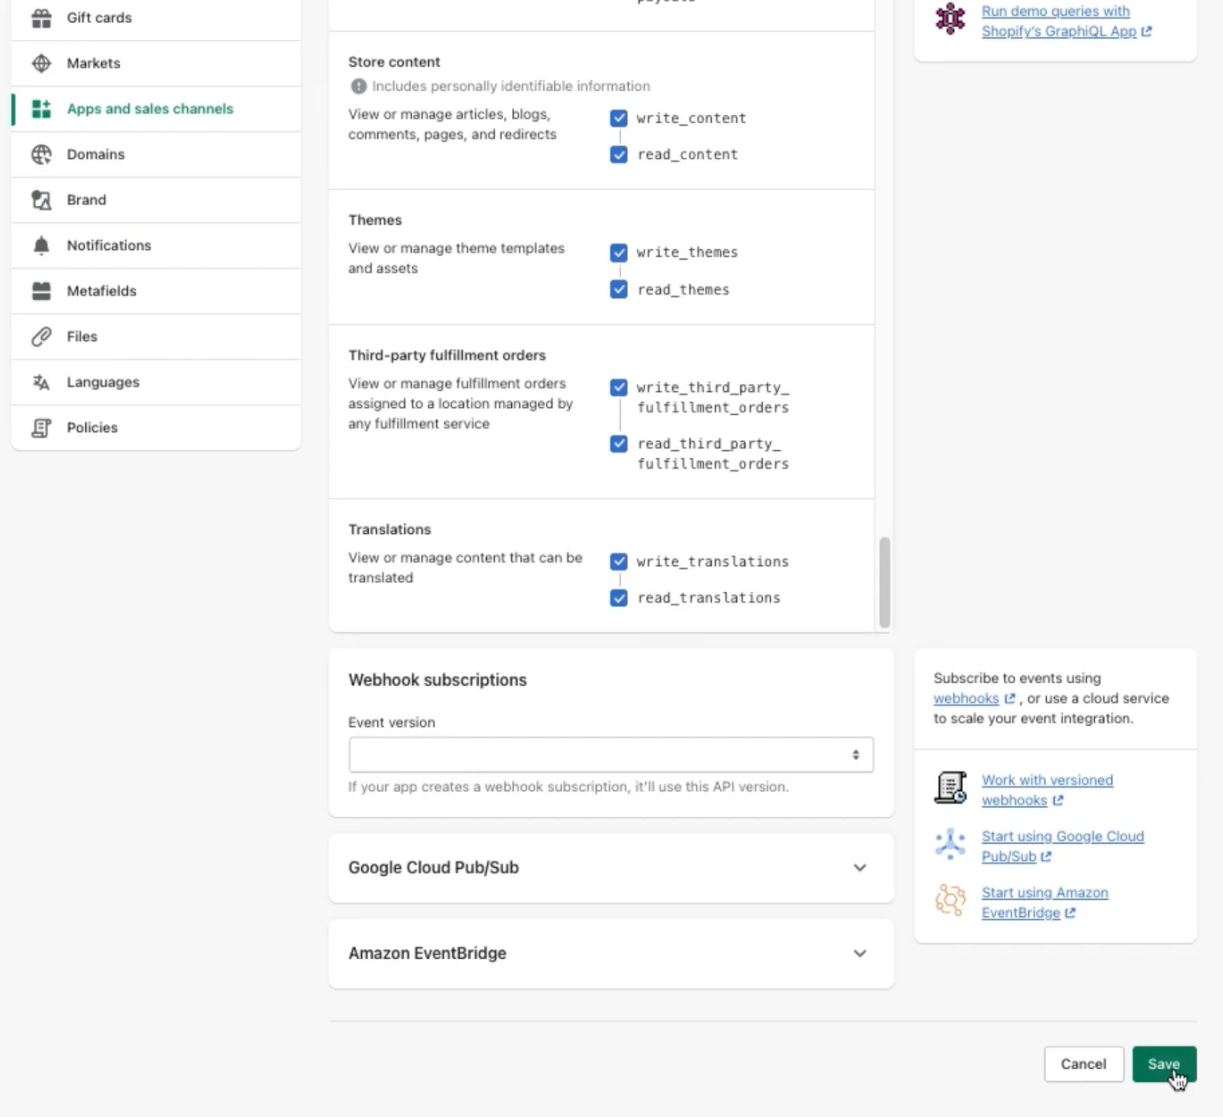
In this area, scroll down and check all of the boxes for permissions. Once all are marked, click on “Save” at the bottom of the screen.
You can now scroll back up and click on the “Install App” button in the upper right corner. In the resulting popup, also click “Install”.

At this point, Shopify will display the Admin API access token, which you’ll need to copy and paste in the Litextension wizard source cart section.
TIP: Shopify security only allows you to reveal your Admin API token once so make sure you save it in a secure place. If you need to create a new API token, press the “Uninstall app” button in the upper right corner, then “Uninstall” to get the new token.
Set up the target cart
In the “Target Cart Setup” section, select WooCommerce as your target cart type and fill in the Admin URL of your WordPress installation (the link to the page where you log in as an administrator, usually something like https://yourdomain.com/wp-admin/) then also type in your administrator username and password.
It’s time to move on to the next step by clicking on the orange “Next: Configure your Migration” button!
Choosing what moves over
If everything has been properly configured, in the second step of the migration wizard, you’ll find a selection of entities that can be transferred. Simply check the boxes next to everything that you want to migrate or click “Select All” in the “Entities to Migrate” section to move everything over.
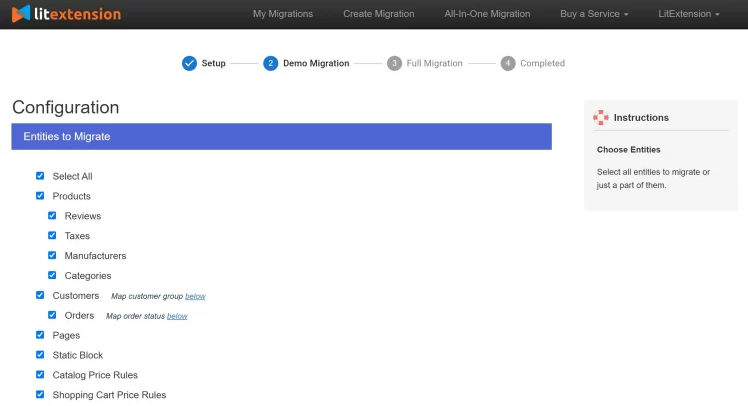
On the same page, you’ll also have some additional options for your migration (some that cost extra) where you can further enhance your migration. These options come in handy when looking to migrate complicated data like customer passwords and product SEO URLs.
TIP: One such example would be: due to the differences between Shopify and WooCommerce, your order IDs might be mixed up, thus creating a problem after the migration. This is where an additional option such as “Preserve Order IDs on Target Store” might come in handy.
Also, make sure not to forget to map your order status and language so that they will be properly displayed on the WooCommerce site.
Finalizing the migration
TIP: Litextension strongly recommends that you click the “Start free demo migration” option and get a check up on how your store will look and behave before moving into a full migration. On the next page, you’ll have a button that allows you to check the results.
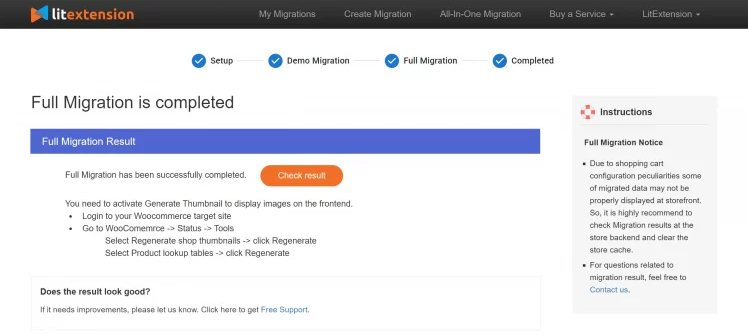
If you choose to skip the Demo Migration, you’ll move into fully migrating Shopify to WooCommerce. Since the Litextension migration is cloud-based, you don’t need to keep your page or device open during the transfer. Once complete, you’ll get an email notification informing you.

Once your full migration process is finished, you can also check the last step of the process and use the “Check result” button to see if the migration worked smoothly and get some extra indications on what other tasks must be done to ensure your new WooCommerce store is in good shape.
TIP: Remember to check both the front end and the back end of your WooCommerce store. If there are any errors, you can contact the Litextension technical support team and they will help get any issues resolved.
Migrating with S2W
Introduction
If you’re more of a tinkerer or are looking for that power user vibe when installing or configuring your software, our third recommended solution is.. just that. It’s a WordPress plugin rather than an online tool so the expectation is that you know your way around the WP dashboard if you’re looking for a more advanced tool.
While the actual migration process is similar, one might say even easier than Cart2Cart or Litextension, the amount of options for filtering, mapping and setting up your migrated data is a lot larger.
Similar to the other tools, there is a free version you can test before purchasing, and S2W also offers a link to a Demo installation where you can get more familiar with how the plugin looks and works even before having to set anything up yourself. You can take a look at all of it here.
Migration Pricing Tool
Since the S2W (ShopifyToWoo) plugin has a flat fee and no extra charge based on the volume of your migrated data, a pricing tool isn’t really necessary.
Sign Up & Installation
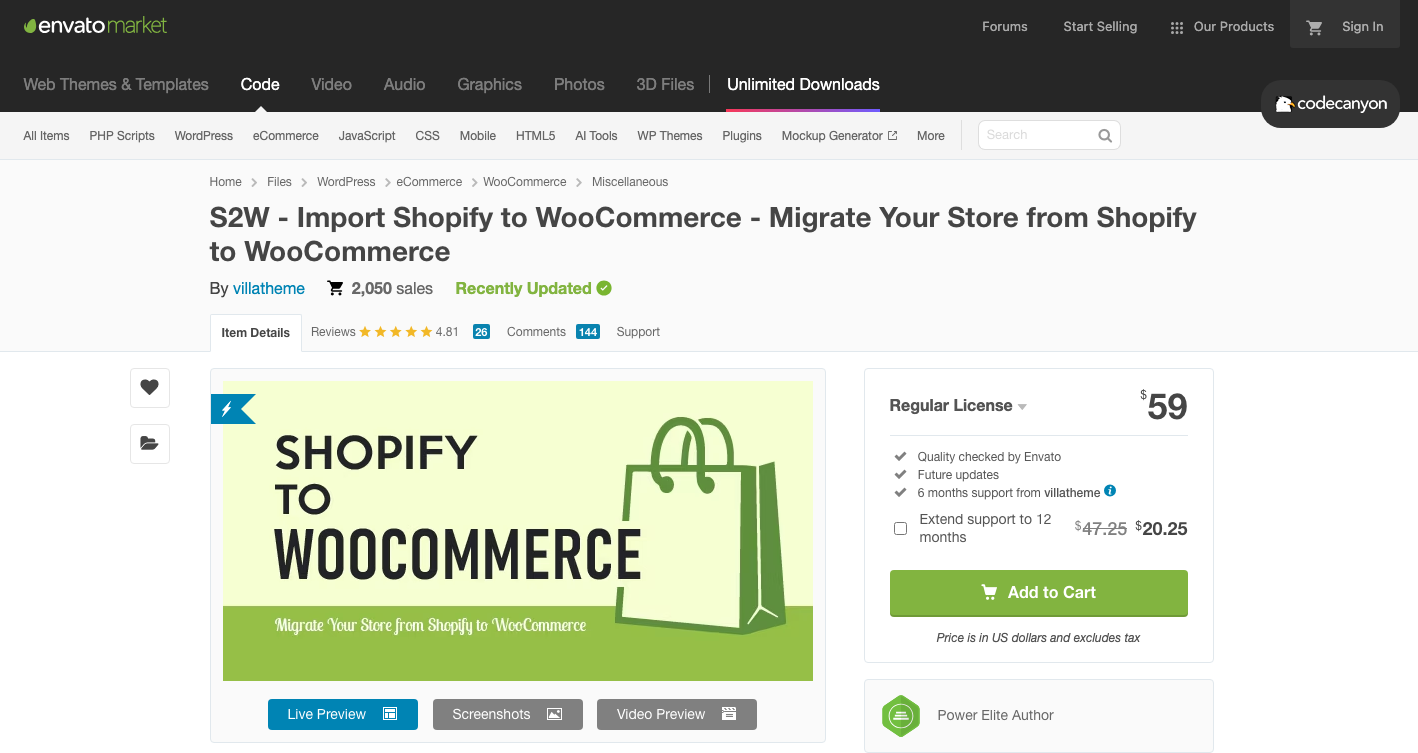
The official paid version of the plugin is sold through Envato Market which is a highly trusted marketplace for plugins, themes, etc. so you’ll need to have an account there to purchase S2W. Here’s the page for the plugin.
You can click on the “Sign In” button in the top right corner of the screen and if you don’t already have an account, you can use the “Create an Envato account” link at the bottom of the popup to sign up.
Once you’ve purchased the plugin, click your account name that has now replaced the “Sign Up” button in the top right corner and from the dropdown menu, choose “Downloads”.
The plugin should appear in your list. Click the green “Download” button and from the dropdown menu, select “All Files & Documentation”.
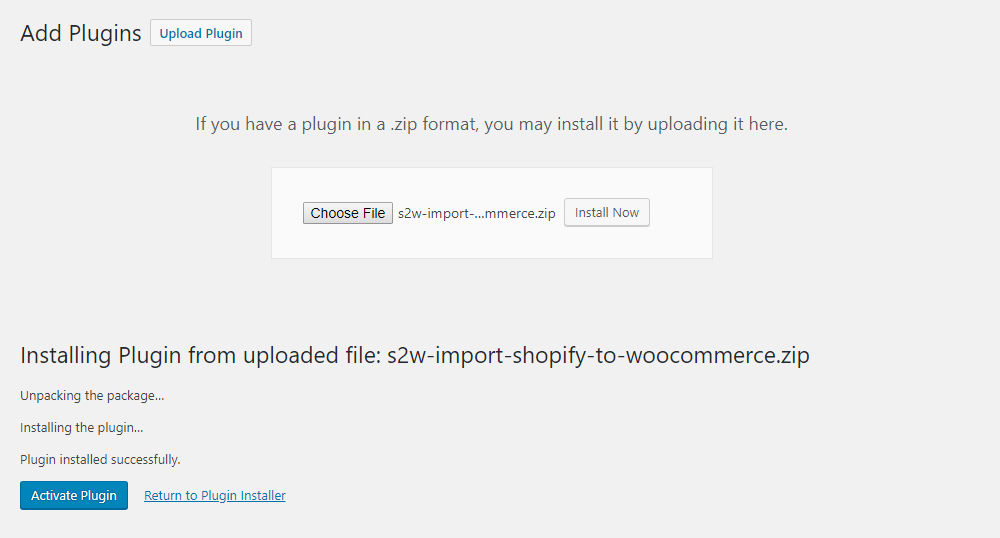
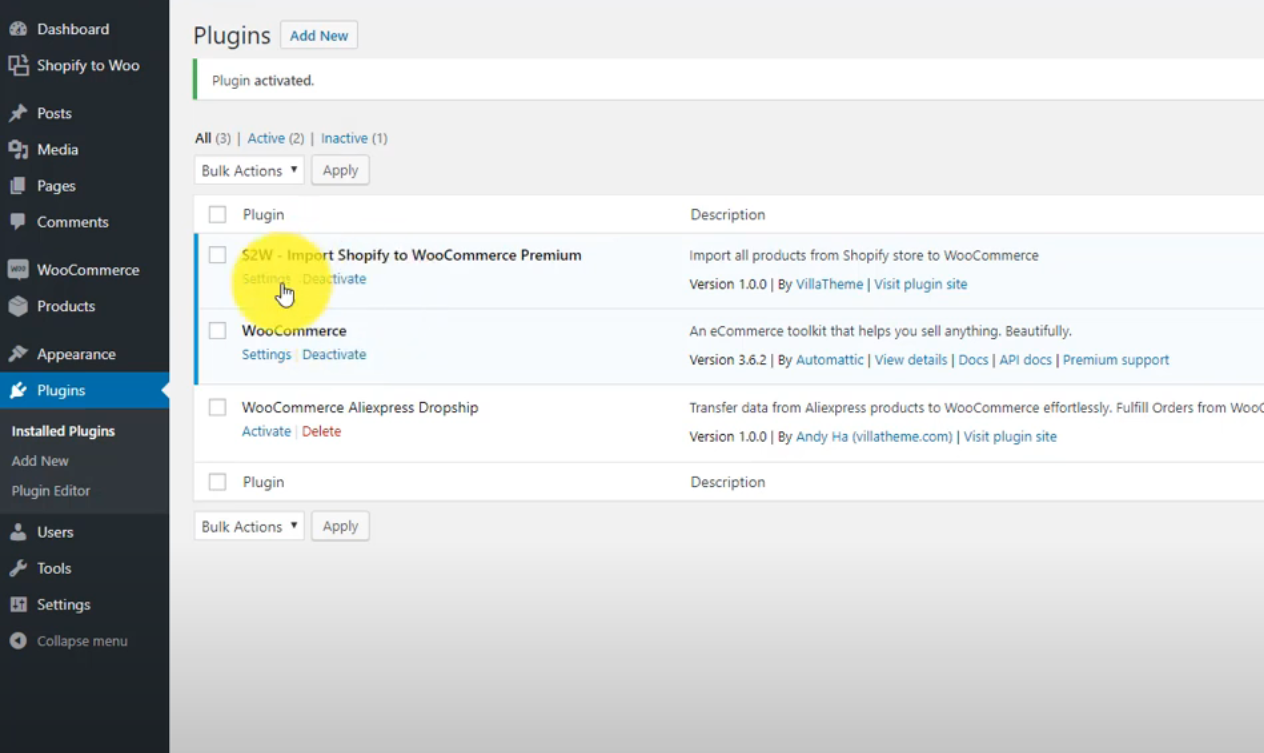
Now, let’s head over to your WordPress administrator dashboard. From the left side menu, click on “Plugins” then “Add New” and then “Upload Plugin”.
In the middle of the screen you should see a button with the label “Choose File”. Click it and select the .zip file you downloaded from Envato Market. Click on “Install Now” and then on “Activate Plugin” to.. you know.. activate the plugin 😄.
Now that the plugin has been installed and activated, you will find it in the plugins list under the “Plugins” tab of your WordPress admin dashboard. Click the “Settings” link under the “S2W – Import Shopify to WooCommerce Premium” label.
This will redirect you to the settings tab where most of the setup is done.
Setup
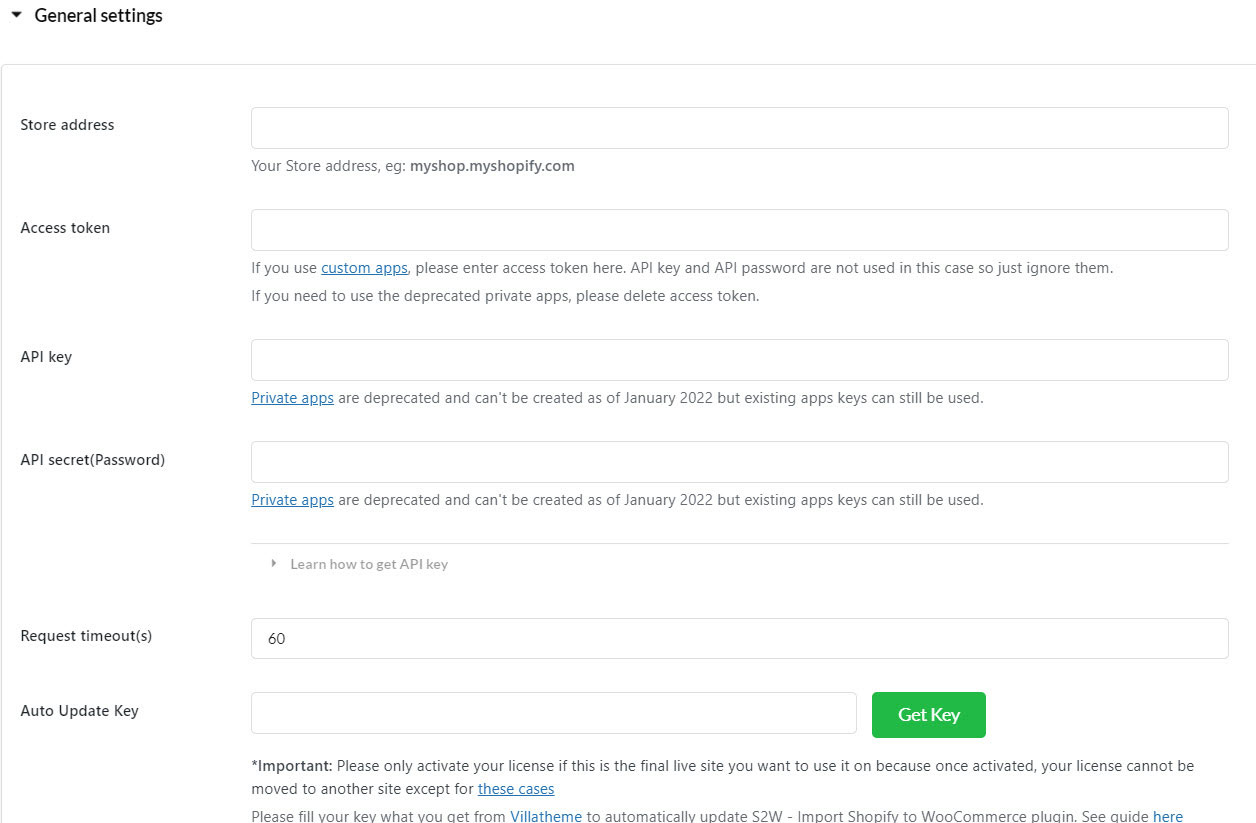
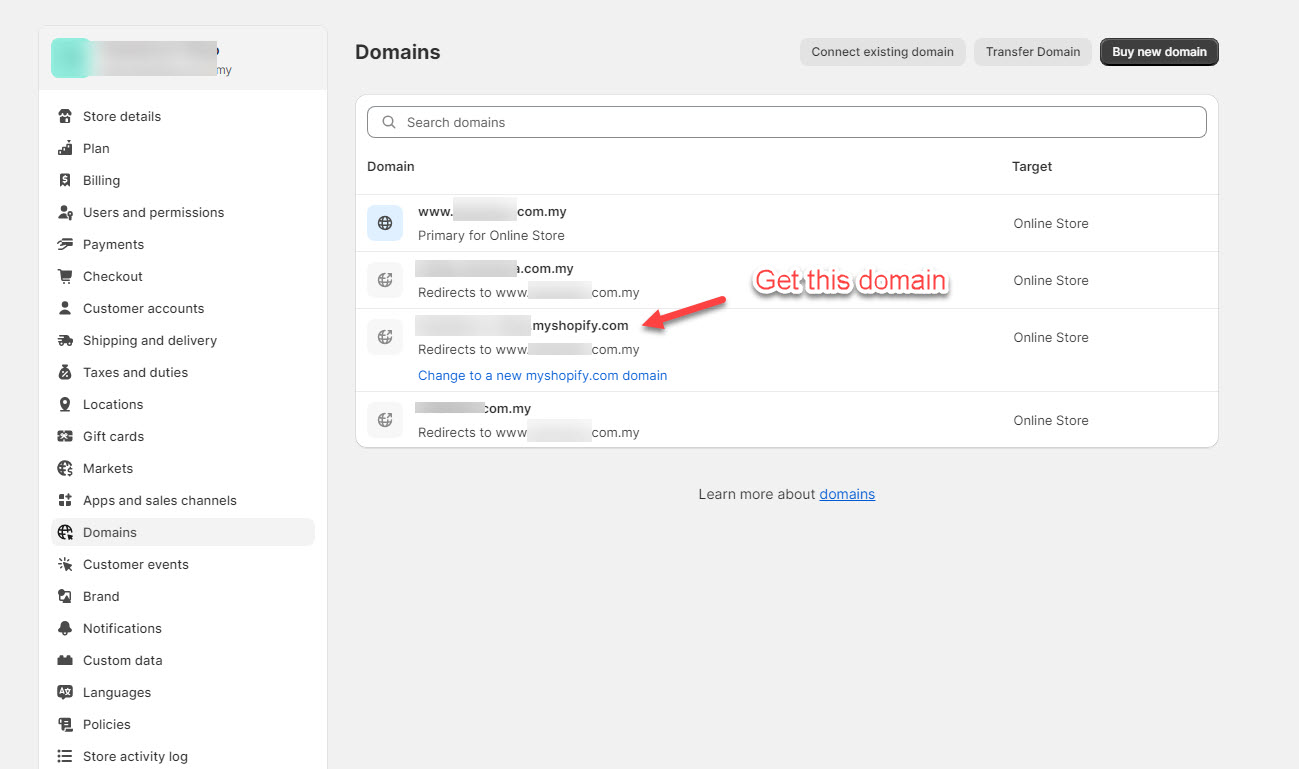
Once you’re on the settings page, you first have to fill in your current Shopify store address, you can find the Shopify store address by accessing your Shopify account dashboard, clicking on “Settings” and then “Domains”. If there are multiple entries, look for the one ending in myshopify.com and copy that one.
Next, you’ll have to navigate over to Shopify and access your account dashboard. Once there, click on “Settings” and then on “Apps and sales channels”.
Now, click on the “Develop apps” button in the top right corner of the screen.
On the resulting page, click on the “Create an app” button in the top right corner and then type in a name for your app. Confirm the app creation by clicking the “Create app” button in the bottom right corner of the popup window.
The next step is to click on “Configure Admin API scopes”.
In this area, scroll down and check all of the boxes for permissions. Once all are marked, click on “Save” at the bottom of the screen.
You can now scroll back up and click on the “Install App” button in the top right corner. In the resulting popup, also click “Install”.
Shopify will now display the access token, API key and API secret key (password) which you’ll all need to copy and paste in the S2W settings page, each in their respective boxes.
TIP: Shopify security only allows you to reveal your access token once so make sure you save it in a secure place. If you need to create a new access token, press the “Uninstall app” button in the upper right corner, then “Uninstall” to get a new token.
The next field, Request timeout(s) is a setting that will help if your website’s hosting server is a bit.. let’s say.. Lazy and is prone to communication timeouts. If you happen to get any “Request Timeout” errors during a data migration process, increasing the number in this box will help get around such issues.
The last input box on this page is for the Auto Update key that you get in the documentation downloaded from Envato Market. The standard Auto Update period is 6 months but you can extend support up to 12 months when you purchase the Premium version of the plugin.
TIP: Only activate your premium license with the actual live website that you want to migrate the data to. Once activated, S2W will not allow you to transfer your Premium license except for some very specific cases.
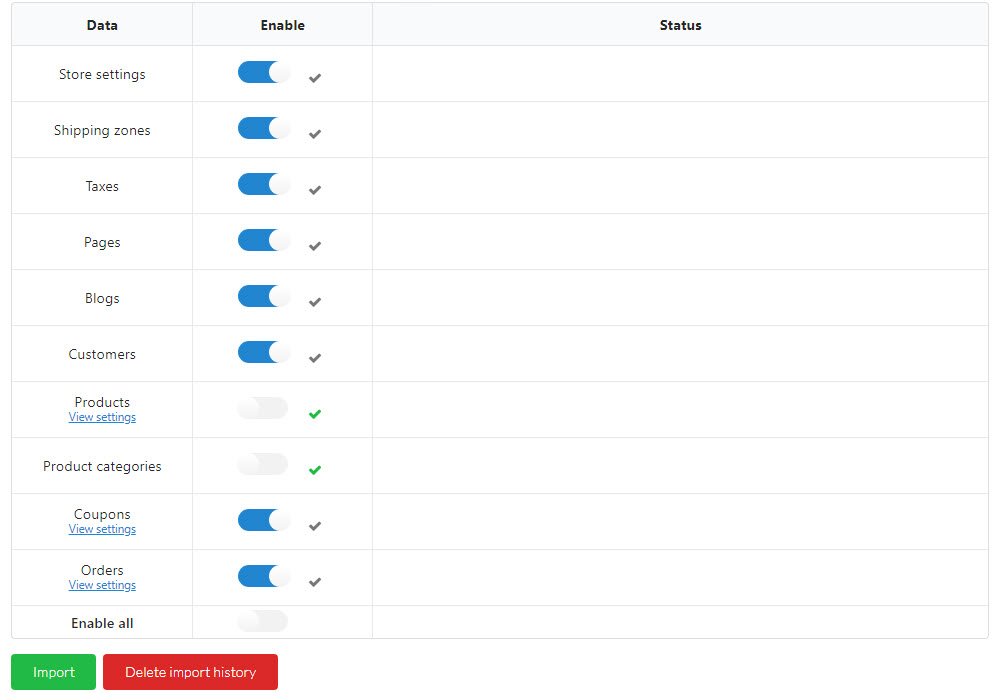
If all information has been added correctly, you can now click on the “Save” button at the bottom of the tab. You can now scroll down to the next tab and select what data you want to import.
Here is everything that the plugin allows you to migrate:
- Store Settings: site title, admin email, store address, city, country, state, postcode, timezone, weight unit, currency code, currency format
- Shipping Zones: shipping zones and shipping methods
- Taxes: tax name, tax rate, country, province, zip, shipping
- Pages: title, content
- Blogs: blog title, blog content, categories, tags, featured image
- Customers: first name, last name, phone, company, address, city, province, zip, country
- Products: products: title, content, excerpt, variations, product image, variations images, product gallery, SKU, stock, regular price, sale price, weight, categories, tags
- Product Categories: product categories, sub-categories, add imported products to imported categories
- Coupons: coupon types that WooCommerce support, coupon amount, usage limit, expiry date, minimum amount
- Orders: payment method, shipping method, first name, last name, company, country, address, zip, city, province, phone, total, subtotal, tax, discount, shipping cost, currency, date create, browser IP, customer user agent, line items, discount code, order number, order fulfillment
If you don’t want to pick and choose what to migrate and want everything moved over, you can use the “Enable All” switch at the end of the list to simply make a full migration.
TIP: The import progress will take several hours, please be patient. Product names, descriptions, etc. will be imported first. Product images will be imported later in the background so don’t be surprised when some product does not have pictures.
When the process is finished, your store should be successfully migrated. As with the other tools, S2W does offer support if anything doesn’t go according to plan and the documentation that comes with the plugin offers a very deep dive into import settings and filters for those who need to heavily customize how the data is migrated.
You can also consult an online version of this guide, here.
Chapter 6: Working With A Professional
How to Source Professionals
As many IT experts from the 2000s would tell you, being able to solve a problem in this industry is mostly about knowing how and where to look for an answer. As the online space grows however, so do the number of outlets that recommend themselves as the ultimate source for knowledge on a specific topic (sort of like this guide, oh snap!).
The issue has now become, filtering through the noise and giving yourself the best chance at landing a true professional to help you migrate your store, if that’s the avenue that you’d like to pursue.
Luckily, WooCommerce is directly connected with WordPress and uses many of the same principles when it comes to the developer, enthusiast or specialist communities around it.
WooExperts
The first and most obvious choice is to use the WooExpert certification program run directly by WooCommerce. This is essentially a marketplace where you can find trusted agencies who are ready to help you with pretty much anything WooCommerce related. Members provide support at every level, whether you need a small code fix or have ambitious plans for your store.
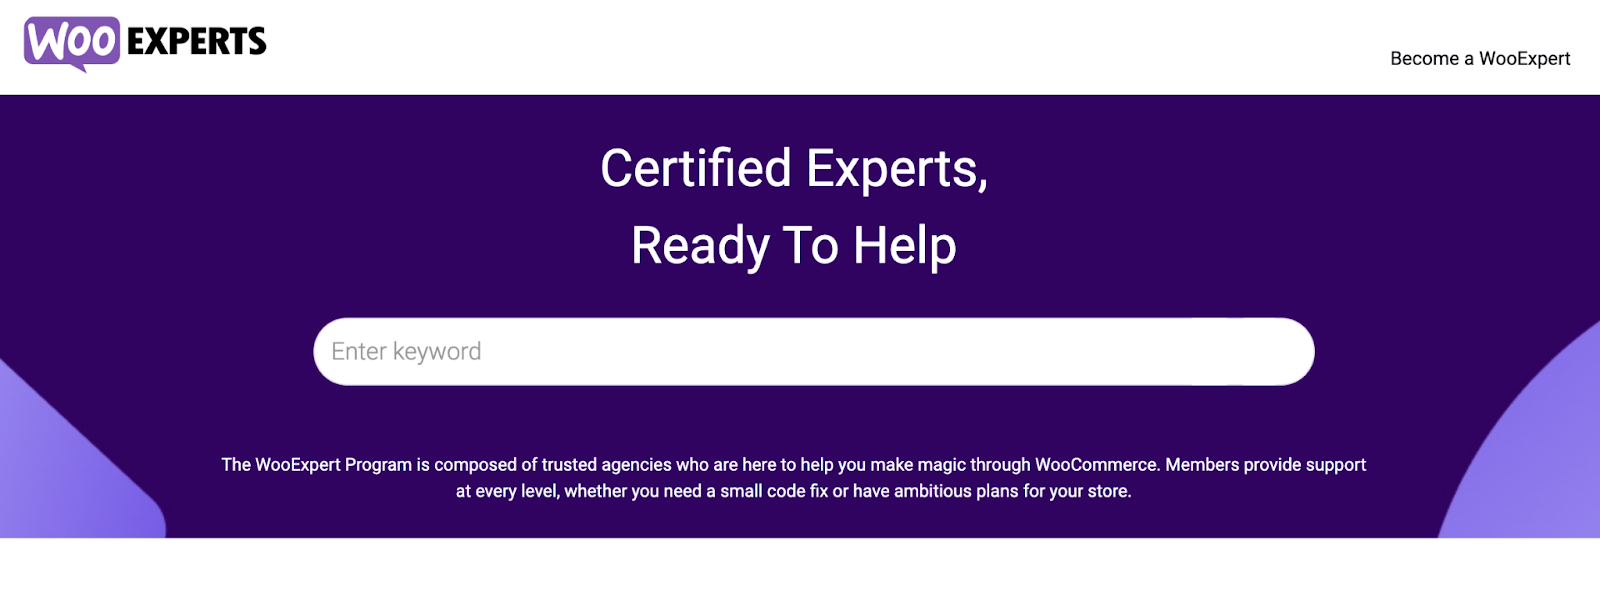
The filtering options are decent and while this guide should be more than plenty to guide you through what you need to be aware of regarding your migration, if you feel you need to lock in even further, WooExperts also have a feature where you can get in a consultation to help you get started.
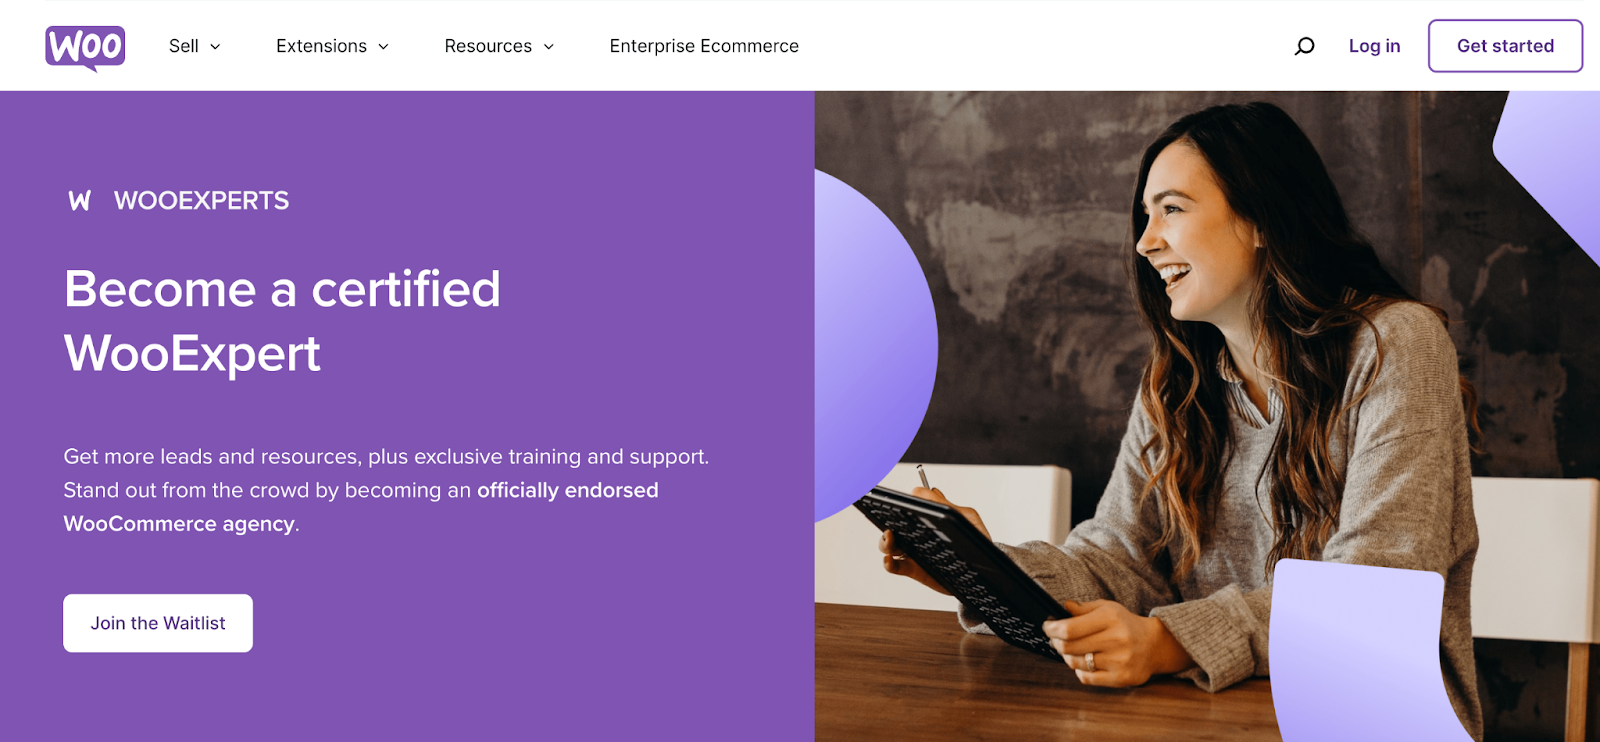
Becoming a certified WooExpert agency means going through a bunch of checkups as WooCommerce holds a very high standard for the agencies they put their stamp of approval on, as well as for their verification and vetting processes.
A proven track record and an elite level of service and support are only a few of the checks required so this is certainly a solid choice when looking for a WooCommerce professional.
Directories
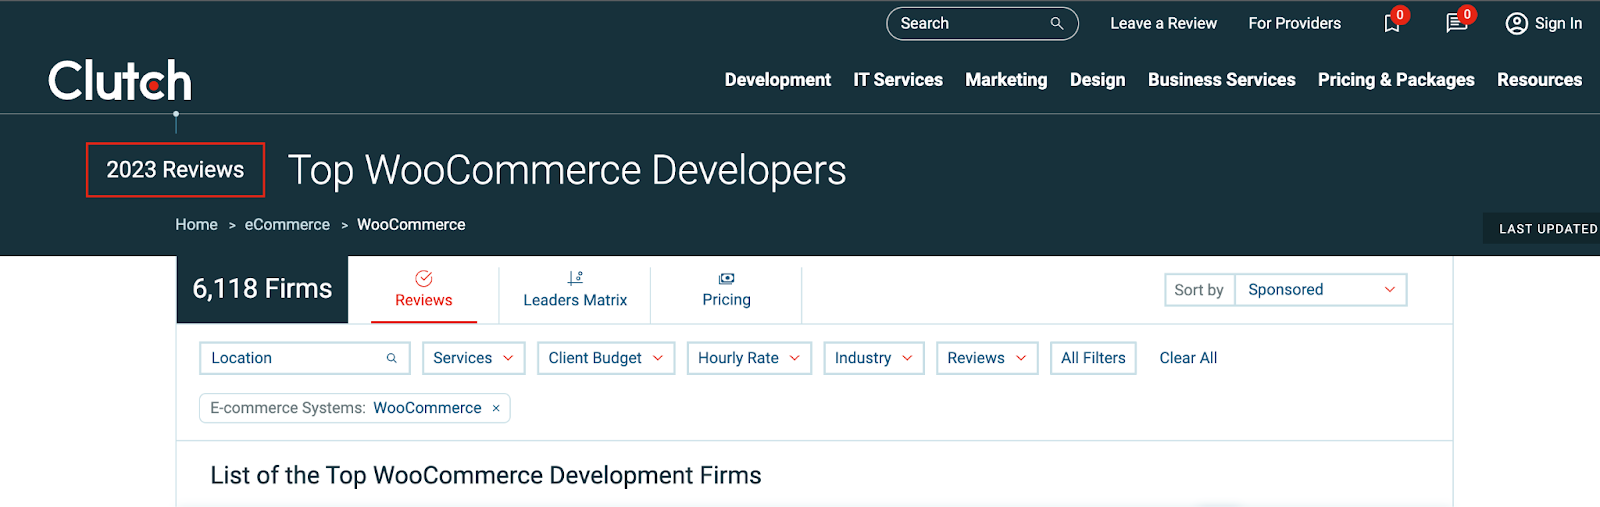
While WooExperts may be the easiest choice when starting to look for a WooCommerce professional, it is by no means the only one. If you’re really looking to deep dive into what kind of professional or agency you’ll be working with to get top notch service for your store migration, there are a few other options out there that present similar quality results.
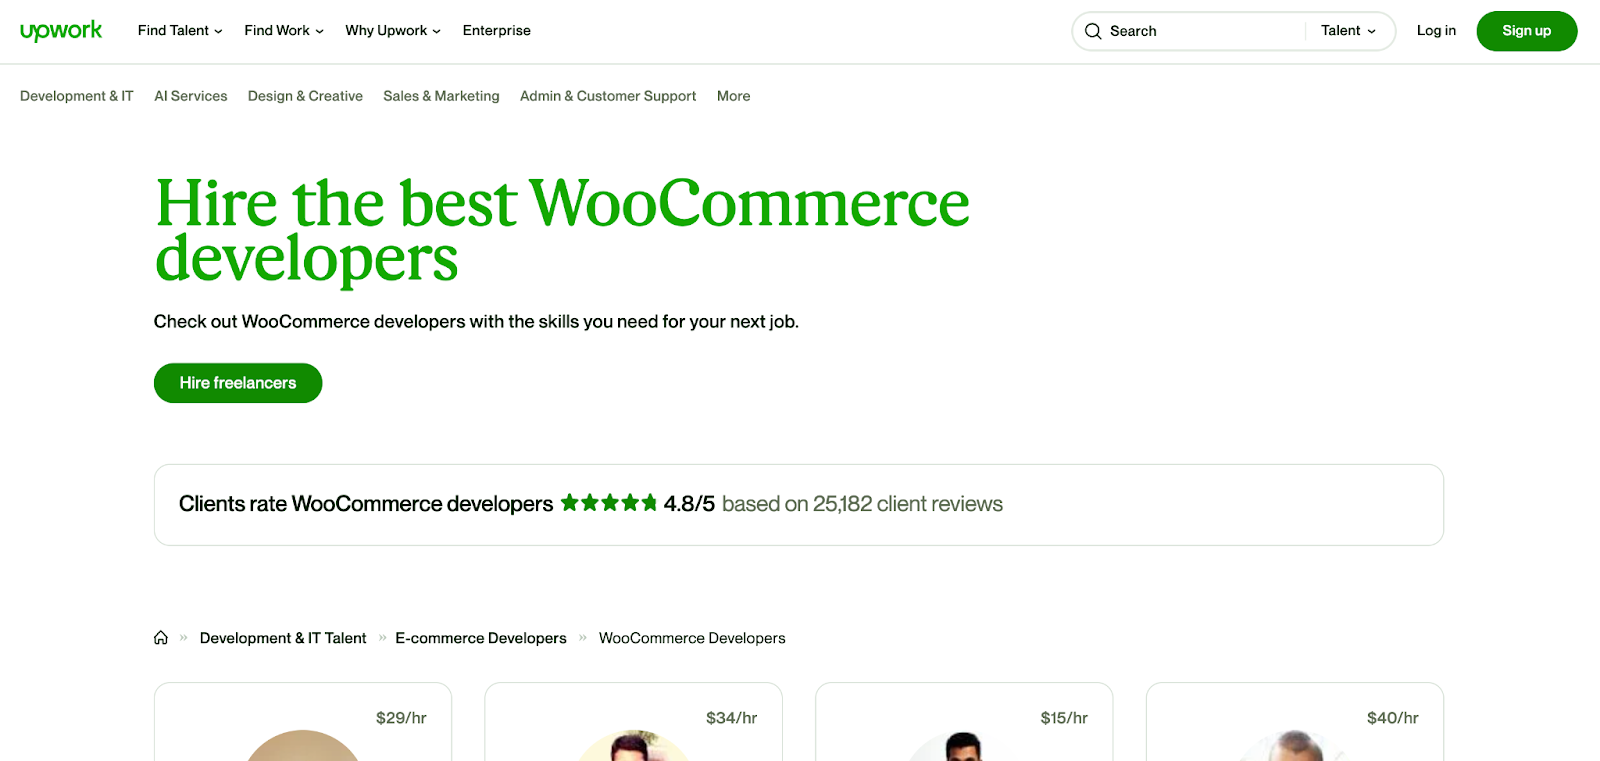
Platforms such as Clutch, DesignRush or Upwork all have excellent directories of WooCommerce experts and plenty of filters such as location, budget, hourly rate, etc. Even Google is a good option to use simply by searching for “WooCommerce experts”, however, read below to find out what combination of information you should take into consideration whenever vetting an expert.
Vetting Experts
As mentioned above, platforms like Clutch or Upwork have pretty good social proof for the top performing experts in any field, but even when searching there (or using Google) you should make sure that your shortlisted experts don’t have any red flags (like offering free work with a neatly placed asterisk that opens up a Pandora’s Box of financial commitments afterwards) and that there is a solid foundation of reviews, case studies and at least some level of transparency on what they charge or what the price range is.
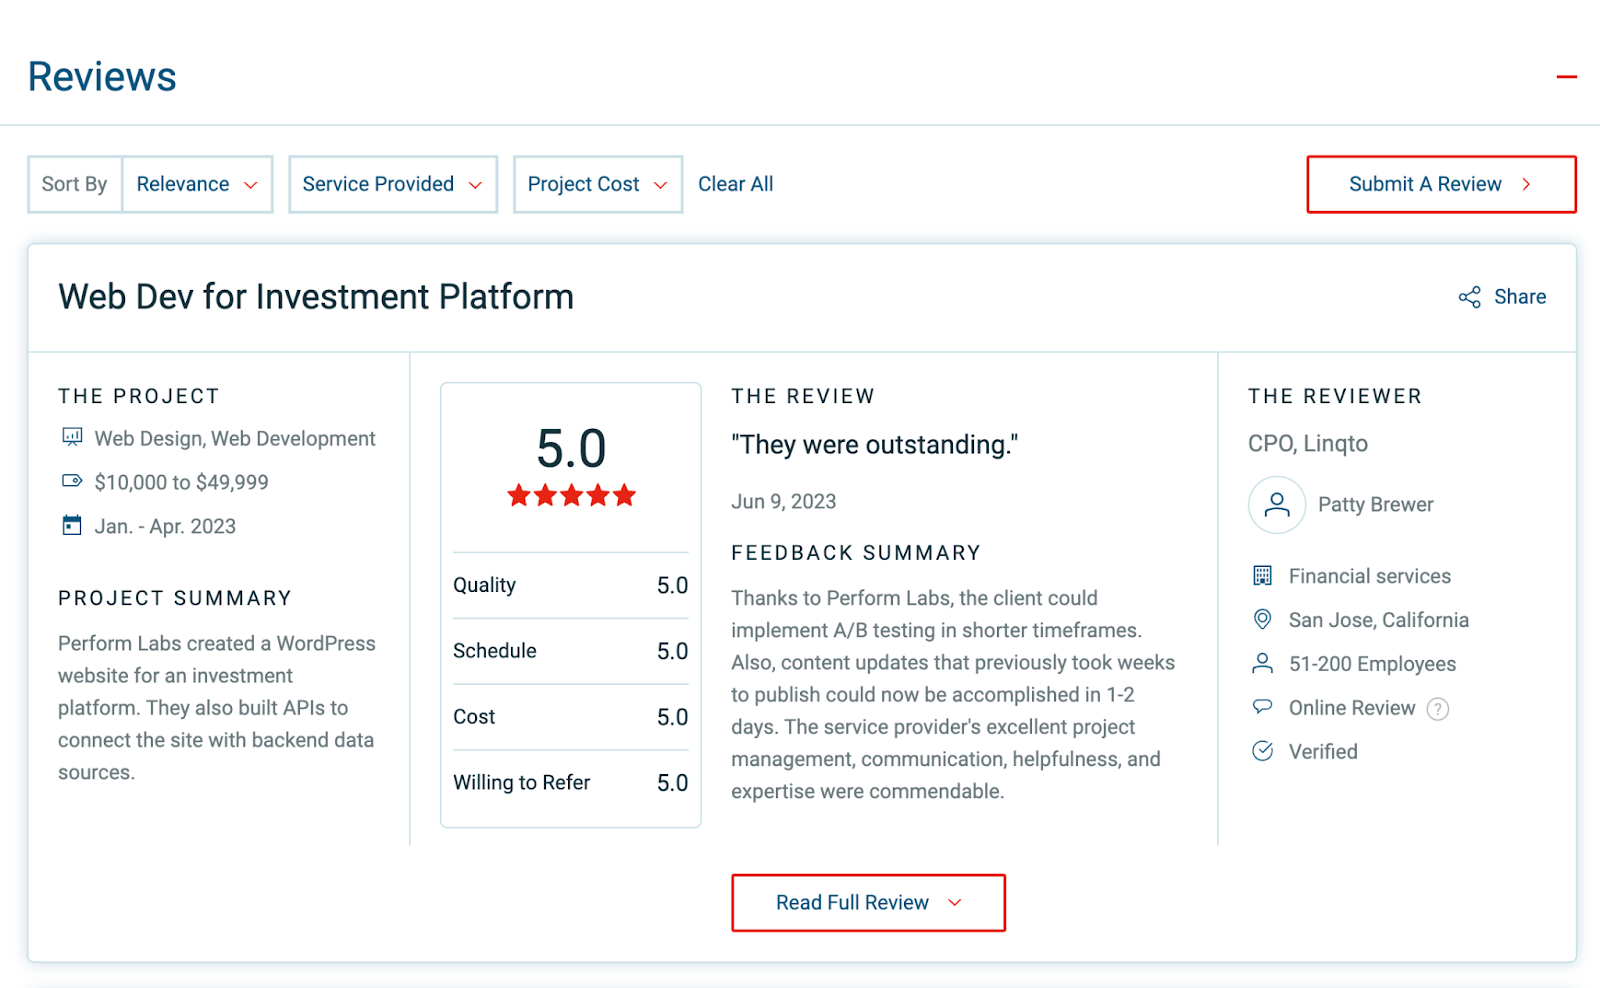
Keep in mind that the modern customer, even for personal shopping, has multiple touch points (sometimes A LOT) with a product or service before considering a purchase, and selecting an expert to work on your store migration should be no different. Checking out their profile on the platform you found them on, visiting their website, looking for social proof and even getting to schedule a discovery call should all be normal if you’re looking to spend decent money towards getting a premium solution that you can depend on for your business to thrive.
Chapter 7: Redirects
At this point, your store should be completely set up. If you haven’t opted for a turn-key solution that includes all the bells and whistles (kudos to you if you have), then one important thing you’ll want to do is to set up redirects so that you’re not losing potential customers by ending up on the wrong website.
Redirects help send search engines and visitors from your old site on Shopify to your new WooCommerce store. It’s an important box to check because it ensures redirects are maintained even when your old subscription ends. If the Nameservers aren’t updated, your links will be lost when your old host deletes your files.
Redirecting Your Custom Domain
If you have a custom domain (ex: performlabs.dev) then setting up a redirect is easy. It mainly means changing your DNS (Domain Name Server) settings in the domain administration interface of where you purchased your domain. Your new hosting provider can give you the DNS server addresses that you need to enter in your domain settings.
They should look something like this:
ns1.cloudways.com
ns2.cloudways.com
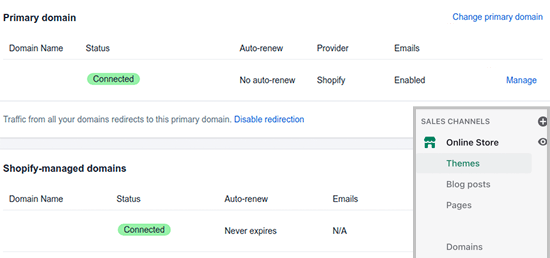
If your domain has been registered through Shopify, then you must go to your account and access “Online Store” then “Domains” and tap the “Manage” button on the right side of the domain visible in the “Primary domain” list then select “Domains again.
This is where you can enter your new DNS addresses provided by your new hosting provider.
TIP: Please note that the effects of this process don’t usually happen instantly. Depending on when the servers are set up to reset, it may take up to 24 hours to see the change take place.
Redirecting Your Shopify Domain
A lot of Shopify stores just use Shopify domains as they are provided to the client when they purchase a Shopify package. (ex: storename.myshopify.com).
If that’s the case for you, unfortunately you won’t be able to use individual redirects. What you can do however, is add a link to your new store by editing your Shopify website.
Updating Product URLs
There’s a good chance that a lot of your product descriptions have links going back to other products on your old Shopify website. There are simple solutions to bulk-updating this process so you don’t have to go in and manually check each product. Two of these solutions are “Go Life Update URLs” and “Better Search & Replace” WordPress plugins.
Updating with Go Live URLs
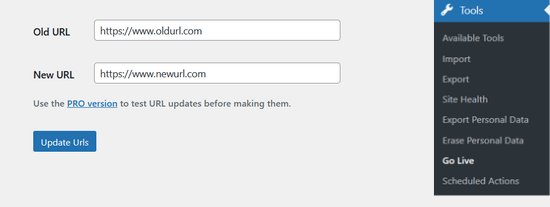
You can download this plugin here and then upload it to your WordPress dashboard manually from the Plugins section.
After you activate it, click on “Tools” in your WordPress dashboard left side menu and then select “Go Live”. Here, you’ll have to enter your Shopify store URL as the “Old URL” and then your WooCommerce domain name as the “New URL” before clicking on “Update URLS”. This should fix all your links. You may now uninstall the plugin if you wish.
Updating with Better Search & Replace
You can search for this plugin directly in your WordPress dashboard. Go to “Plugins” then “Add New” and search for “Better Search & Replace”. Now click “Install” and then activate the plugin.
Once activated, click on “Tools” in the left side dashboard menu and then select “Better Search & Replace”. As before, enter your Shopify URL in the “Old URL” field and your WooCommerce domain name in the “New URL” one. Now select “Update URLS Now” and you should be good to go. You can remove the plugin after the process is finished.
Redirecting Individual Pages & Posts
If you also have individual pages or blog posts you need to redirect, you can use a plugin called “Redirection” to get that going.
Again, head to the “Plugins” tab in the WordPress dashboard left side menu and select “Add New”, then search for “Redirection”. Once you’ve found it, click on “Install” and then “Activate”.
Once the plugin is activated, go to “Tools” and select “Redirection” and then “Add new”. Now you have to add in a specific Shopify page or post URL as the source and then the corresponding WooCommerce store page or post URL as the target. The group will be “Redirections”. Select “Add Redirect”. Rinse and repeat 🙂
TIP: Make sure you thoroughly check out pages before going live with your new store. In most cases you shouldn’t have any problems but it never hurts to double check.
Chapter 8: Troubleshooting Common Issues
WooCommerce is a reliable online store and a great addition to the WordPress ecosystem, however, because of the more technical nature and access to virtually limitless personalization resources, issues can popup that you need to be aware of.
Slow WooCommerce
Troubleshooting a slow WooCommerce site can be split down into a few main categories, which include running an outdated version of WooCommerce, having inefficient or outdated third-party plugins, unoptimized images, page builders, product filtering plugins, an outdated or unsupported theme or even a poorly performing WordPress website host.
Outdated WooCommerce Version
A slow WooCommerce site can sometimes be caused by not updating the plugin. Every new version comes with hotfixes and performance improvements as well as plugs for possible vulnerability issues of older versions that could be exploited by hackers. As a basic rule, always use the latest version.
Before any update, make sure you are backing up your site, either through your hosting provider or with the help of a professional. Once you’re ready to update your WooCommerce version, log in to your WordPress admin panel, select “Updates” and click the “Update Now” button next to WooCommerce if an update is available.
Inefficient Third-Party Plugins
Switching from Shopify to WooCommerce grants you access to a great number of plugins and an ever-growing community of developers which translates into flexibility for however you want to improve your store. This, unfortunately, also opens the door to the possibility of installing a third-party plugin that affects your website (remember, the name of the game is: Backups!).
One of the easier ways to identify if a plugin is giving you a hard time (provided all of your plugins are updated to the latest version) is Query Monitor, a.. Plugin that blows the whistle on other plugins, meaning it will help you find out which plugins cause slow queries in your site’s database. If you want to be extra thorough, you can also disable plugins one by one and use a pagespeed tool such as Google PageSpeed or GTMetrix to compare site loading times.
Unoptimized Images
Website loading time can greatly be affected by improperly optimized images. Particularly when we’re talking about a store. Even if they are sometimes displayed fairly small, there’s a chance that a huge image is actually loaded in the background, thus adding a lot of data and seconds to your pages loading times. Once more, using tools such as Google PageSpeed or GTMetrix will help you identify if this is the case.
An easy solution for most use cases is the Smush plugin (there are other paid tools as well) to optimize any image on your site as soon as it’s uploaded. You can of course use it to optimize existing images as well and it has some pretty nifty conversion features (make sure your theme supports this) for changing image extensions to newer, more web-friendly formats such as .webp instead of the classic .jpg or .png files. Combined with the WordPress embedded cropping tool, you should be able to drastically improve your load times if unoptimized images represent an issue for your site.
Page Builders & Product Filtering Plugins
One of the newer trends in the WordPress ecosystem is to make building a site easy by using a page builder such as Elementor or Divi. While this does indeed help with building your custom pages layouts, designs and content, there are sometimes hidden problems.
Page builders need a lot of extra code and scripts to run properly and this brings a particular hit to performance on eCommerce sites. Recent improvements have seen some block-based builders do a better job of not adding as much stress on site resources but going with the classic page builder or getting a developer to craft specific use case pages or categories of pages remains the preferred option.
Same goes for product filtering plugins that can often need very heavy database queries and put a bigger strain on server performance. Yet again, this is something that, if you’re working with a developer, you might want to get out of the way early through a custom build with minimal impact on resources.
Poor WordPress Hosting
The competitive nature of the web hosting industry has made it so that there are considerably more options to work with than in the past, but don’t get it twisted, there’s still plenty of mistakes to make, from choosing a provider to selecting a plan and what features you need.
When it comes to eCommerce stores, moreso WooCommerce, higher server specs like CPU, memory and such, make a difference but so does getting a managed WordPress host who will also provide you with a variety of customizations and support for your specific WooCommerce needs. Cloudways is a great example of what a solid, reliable host for WooCommerce is.
Unsupported WooCommerce Theme
This is another great example of WooCommerce having many more resources on hand than Shopify but you need to be aware of a theme’s compatibility with your particular setup. Using an unsupported theme might end up giving you performance issues or even technical problems.
If you’re working with a WooCommerce professional to get a 1-of-1 design for your store, this shouldn’t be an issue but if you’re looking for an out-of-the-box solution, you’ll want to be sure to stick to a WooCommerce certified storefront theme.
Non-functional Contact Form
Out of the many issues you may encounter with.. Basically any piece of software, the one thing that you definitely want to stay away from is for a customer not to be able to contact you (for any reason).
As we’ve already mentioned earlier in this guide, modern customers use multiple touch points with a product, service or business before deciding to buy, and contact is certainly one of them. The most common contact form for WordPress is Contact Form 7 and while it is a great tool, you certainly don’t want someone who fills out a form to be greeted by an error message.
There are multiple layers to ensuring that your contact form functions properly, such as going to the contact form settings and ensuring all required fields are filled out properly and you’re using the correct mail tags but on occasion, it can be a server issue. Contacting your hosting provider can help clear up any server issues that may arise.
If you feel like looking for a different contact form solution, there are more robust plugins such as Gravity Forms or Ninja Forms.
That’s all folks!
This brings us to the end of our definitive guide on migrating from Shopify to WooCommerce. It’s surely a chunky read so congratulations if you made it all the way through. You’re now completely prepared to run through the entire process.